
Without the audio, the gameplay is not complete. If there is no audio while doing live streaming, then the players and the audience will not feel the thrill and the enjoyment they are meant to feel. That is why audio is a very crucial part of live streaming, as it makes the content more enjoyable and easily understandable.
Esports has become a growing entertainment form, and gamers share their live gameplay on various platforms. Several applications can broadcast live gameplay among these discord is probably the most famous one for its user-friendly interface and ease of use. Today I will share the knowledge of how to play audio through discord while doing live streaming.
Let’s dive in.
Process Of How To Play Audio Through Discord
The process of playing desktop audio on live streaming is quite simple if you get it properly. From several methods, we will learn about the simplest and hassle-free method of sharing desktop audio and your voice while doing live streaming. This process of sharing audio through discord involves an application name Voicemeter.
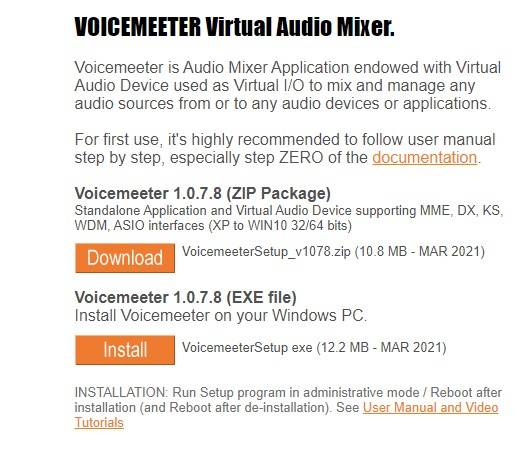
Step-1: Download Voicemeeter
Visit Wait for the page to load fully. After loading, scroll down, and you’ll see different download options. Among those, download the exe format of voice meeter by clicking on Install.
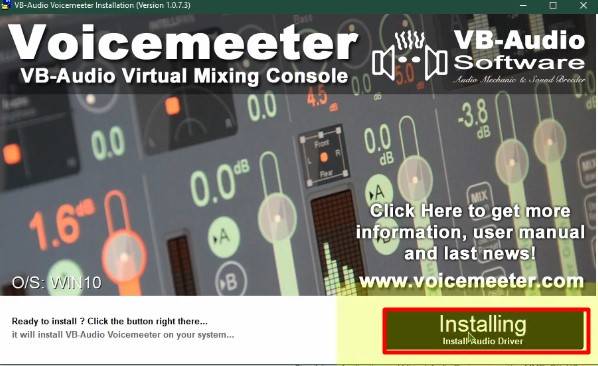
Step-2: Installing Voicemeeter
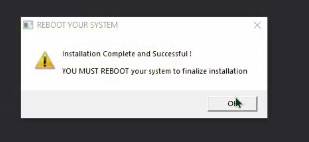
After downloading Voicemeeter, it is time to install the app. Double click on your downloaded file and then click on Install to install the app. Give it some time to get installed, and after the completion of the process, restart your computer.
Step-3: Download VAC
VAC means virtual audio cable, and with the help of this, it is possible to play audio through discord without any trouble. For downloading VAC, visit On the right of the page, you’ll find the zip file of VAC. Download that file.
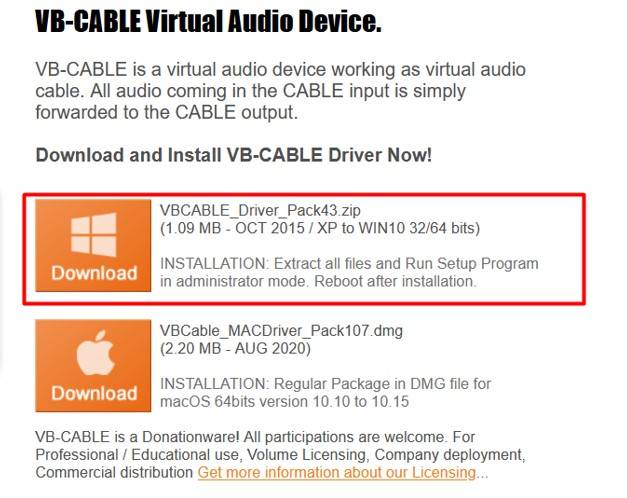
Step-4: Unzip VAC
Go to the folder where you have downloaded the zip of VAC. Now, unzip that file.
Step-5: Instal VAC
After unzipping those files, browse those. Among those files, you’ll see a file named VBCABLE_Setup⨯64.exe. Run this as an Administrator by right-clicking on it.

After that, you’ll see a pop-up on your computer screen. On that, click Install Driver.

After installing it, the computer will ask you permission for restraining. Restart your device again, or else the driver will not work.
Step-6: Change discord settings
Open the discord app or application. After opening, sign in to the application, and after that, you’ll see the home screen of discord. On the bottom left corner, you’ll see your profile icon. Click on the to access the User Settings. In that setting menu, choose Voice & Video.
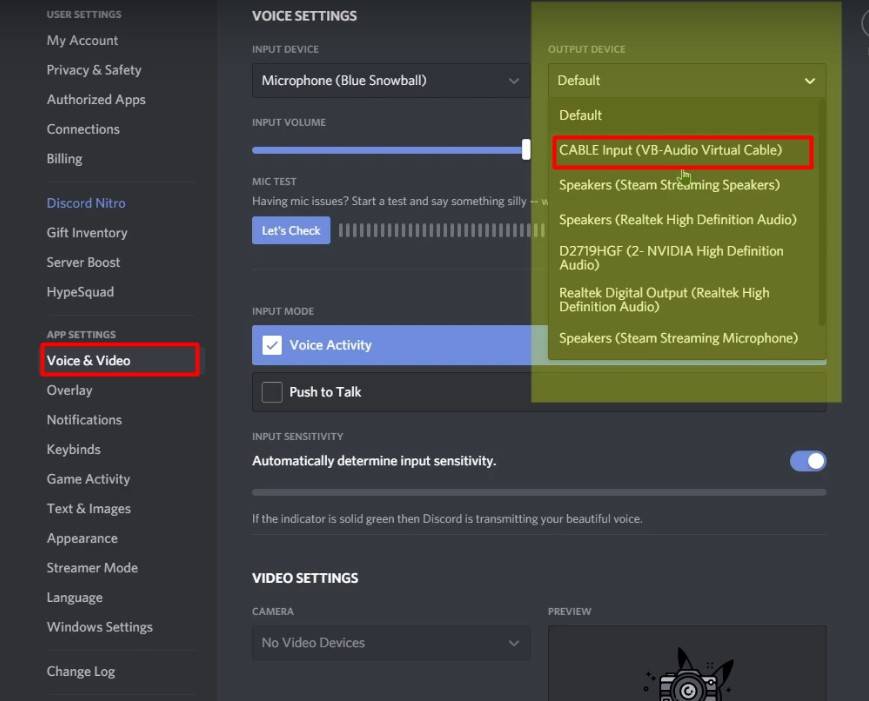
After clicking on voice and video on the right side, you’ll see the Output Device option on there Select Cable Input (VB-Audio Virtual Cable).
After selecting the output device option, close the discord user settings.
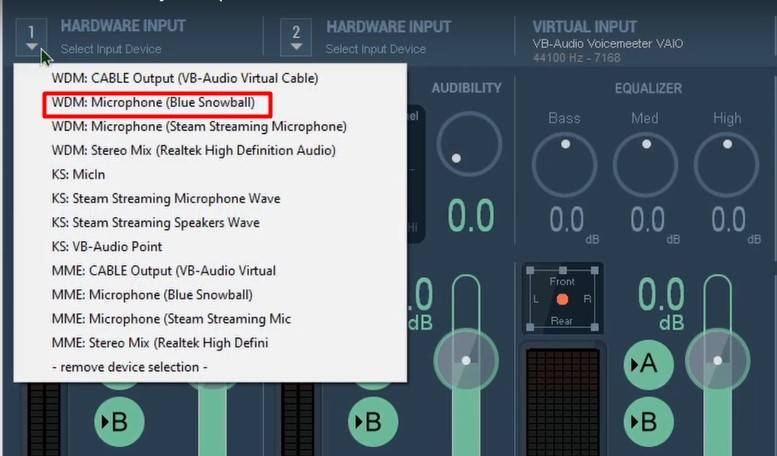
Step-7: Setup voicemeeter
Launch the Voicemeeter, and here you have to make several changes. First, set the 1 Hardware Input to Microphone. To do so, click on the arrow beneath the 1 and select the Microphone option.
Now, select the 2 Hardware Input to Cable. Same as again, click on the arrow beneath 2 and select the Cable option.
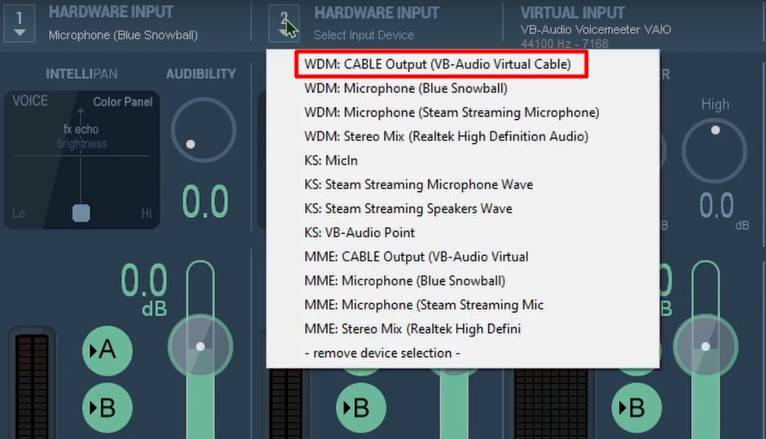
Select the Hardware Out to Speakers.
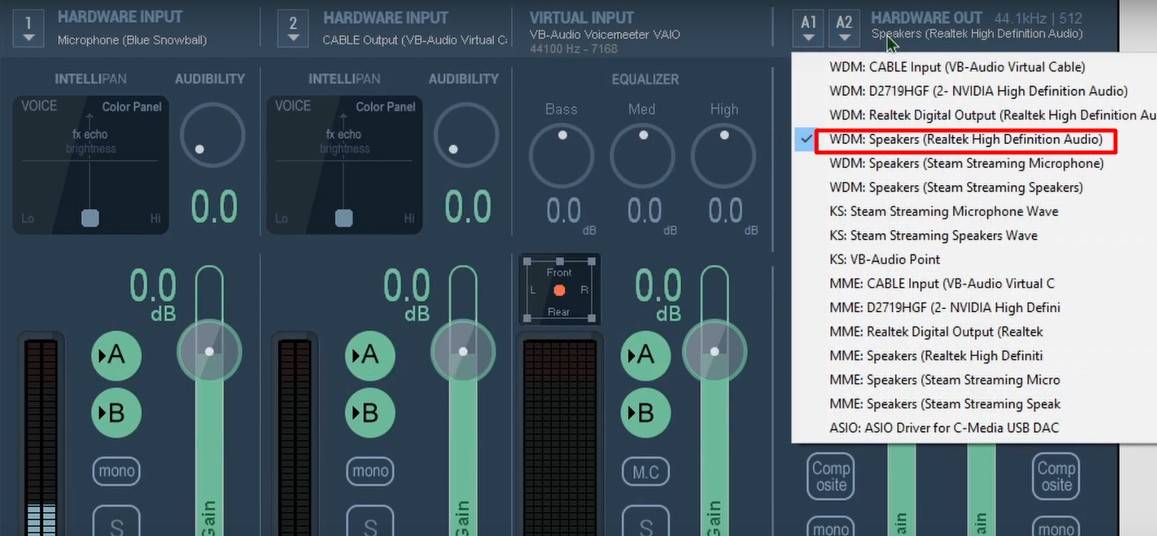
Now select A on your microphone option to make sure you do not hear yourself. Then select B on the Cable option to make sure it does not create echo to those who are on our discord call.

Step-8: Select Speaker
On the taskbar of your computer, click on the Sound icon. After that, Select Voicemeeter input as your Speaker.


Step-9: Final step
After selecting the Speaker, again launch the discord and explore User Settings. From there, select Voice and Video. After that, Choose the input device as Voicemeeter.
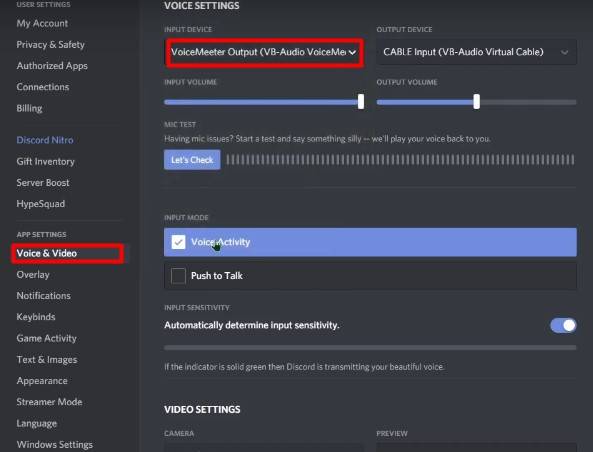
That’s all, now give it a try, and you should be able to share Desktop audio through discord without facing any sort of problem.
How to play desktop audio on Discord Mac
On a Mac, while we screen share on discord, it not only just shows your screen but also broadcasts the desktop sound. So by sharing your screen, you can easily play desktop audio. Here is how you can share your screen on discord on a Mac-
Step-1: Download discord
The first thing you have to do is download and install the discord application on your Mac. After installing, open it.
Step-2: Selecting a room
First, you need to select where you want to share your screen on a private channel or a public channel. To share your screen, enter on a voice channel on a server, and then you can share your screen. Make sure that you keep the gameplay or what you want to share running in the background. If you haven’t, then opened the content in the background, then go back to discord again.
Step-3: Share the screen
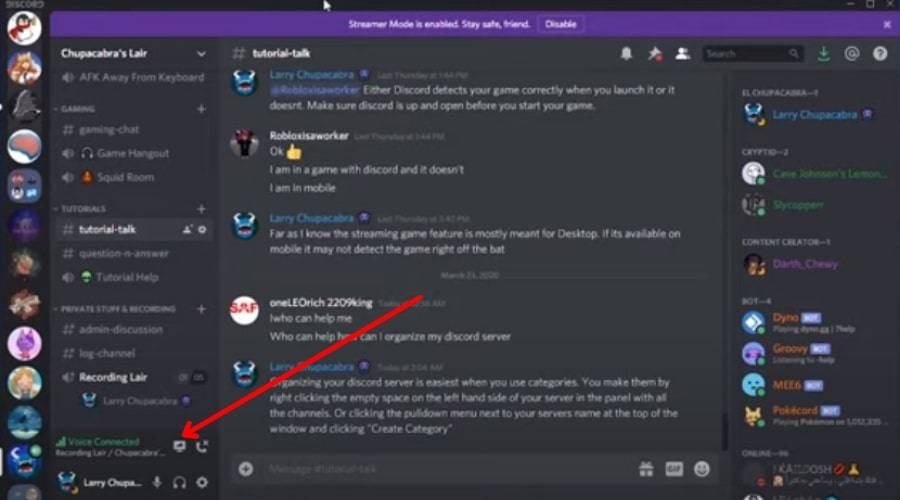
After going back to discord, you can see on the bottom left windows all your background running apps. That happens because discord can detect all background running apps activity on the Mac. where the application’s icon is there, you should find your desired application that you want to share screen. On the right of the application window, you should see a Stream button. Press on it to start the streaming process.
Step-4: Go live
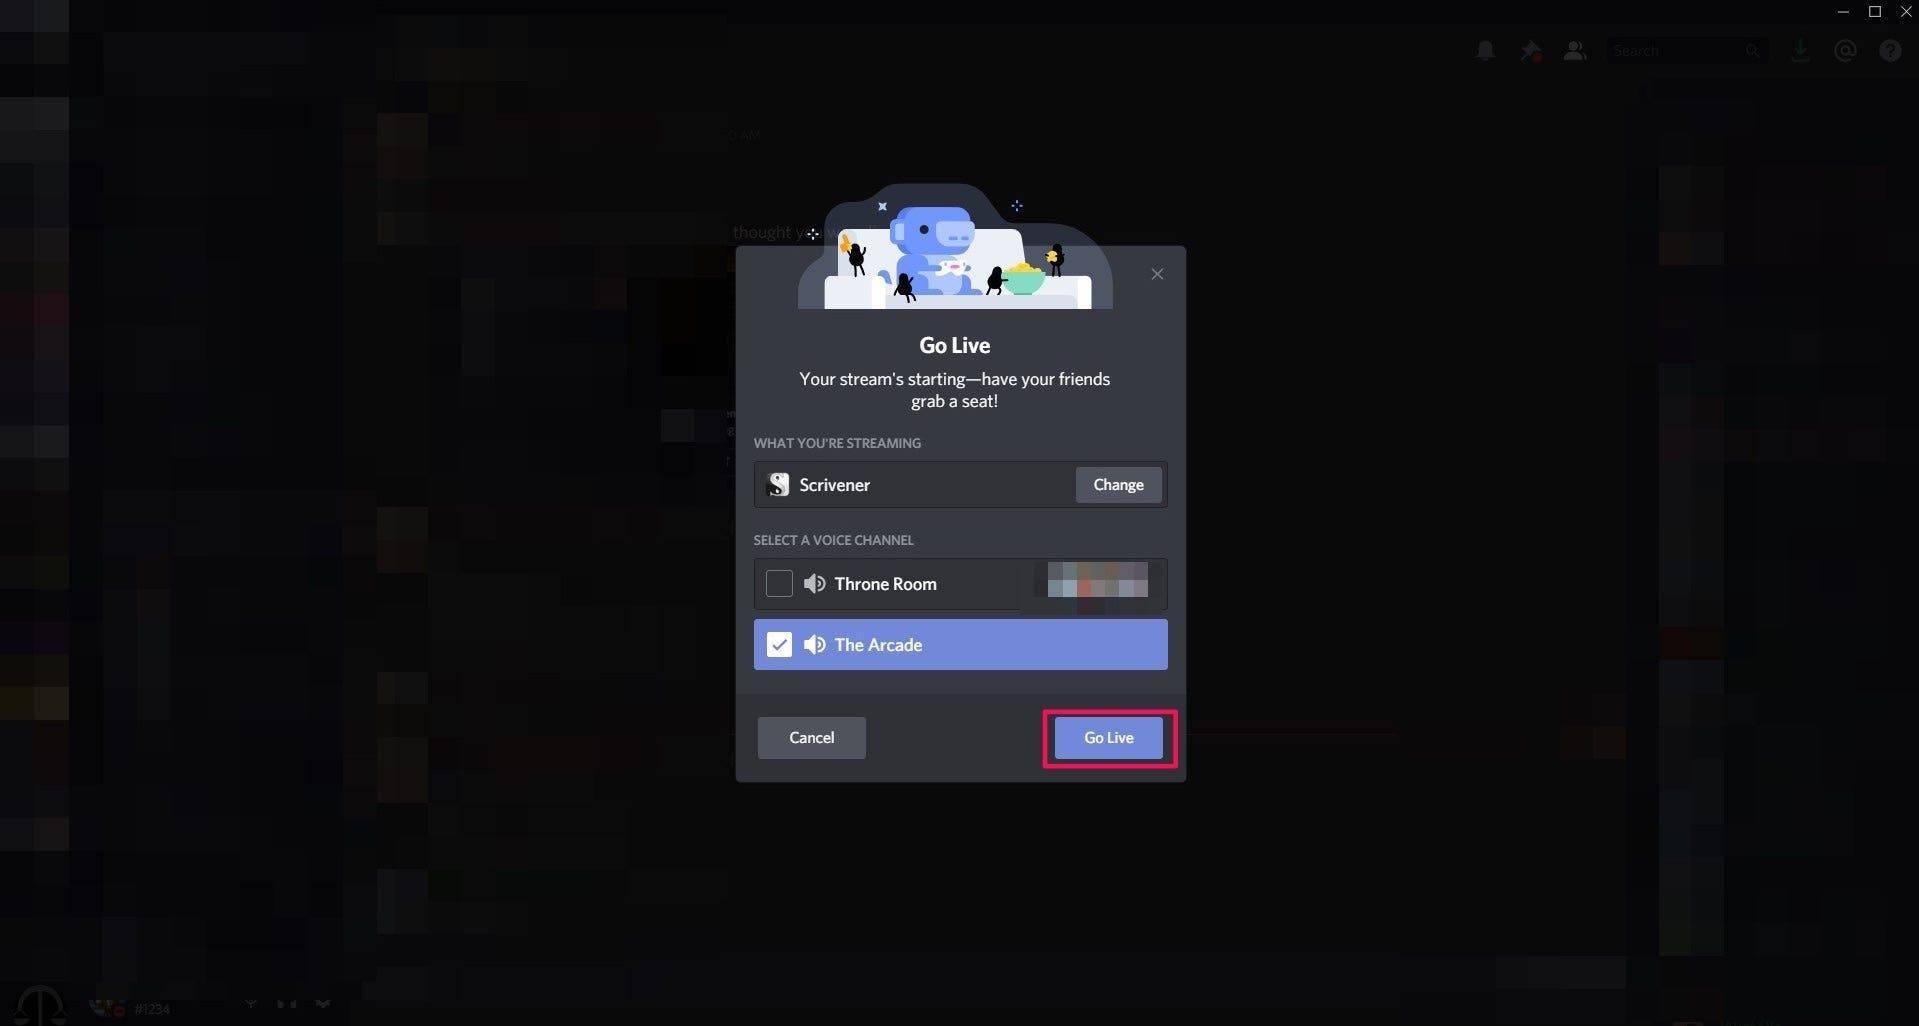
Now you should see a Go live pop-up window on your computer screen. From there, you have to select your desired channel where you want to stream your screen. If you do not see the channel you want, you can change it by clicking on the Change option. After selecting the channel, click on the Go Live option, and that’s it. You are streaming your screen with audio on the Mac.
Discord Soundboard
Discord is a streaming application, and it can also broadcast live audio. So while sharing any content, it is also possible to give live commentary, and sound boarding makes the commentary more fun and enjoyable. That is because using the soundboard apps, it is possible to sound like a baby or a monster and so many other things.
Among so many useful features of discord, it also supports soundboard applications to make the live commentary even more funny and enjoyable to the audience. Actually, there are so many sound boarding apps available right now which are compatible with discords. Let’s know about some of the best options.
1. Resanance
Probably the most popular soundboard app for discord is resonance. That is because this application is free, feature-rich, and user-friendly. Using and accessing the app is very easy, and it gives freedom of choosing so many sound effects that others lack. It is a free app, and it does not cost any money.
2. Voicemod
Another popular option is Voicemo,d and it is not just popular for discord, but it works on many other apps as well. It can produce all of the famous and useful voices for different situations. This app’s user interface is very friendly, and it is a light app that makes it highly optimized.
Conclusion
Many people face problems regarding playing the audio while sharing a screen on discord. With the help of a voice meeter, the problem can easily be solved. I have described the simplest method of how to play audio through discord. Following the steps now, one can very easily play audio through discord.