
It’s helpful to know how to print gridlines in Word if you want the lines in your tables to be legible on paper. Word’s grids make it simple to find specific cells in a paper and input data there. Due to the similarities between tables and grids, it is possible to print grid lines on a page by making the borders and cells of the table sufficiently black. Alternatively, you can adjust a few settings prior to printing by following the steps provided below.
Process of Printing Gridlines in Word Through View Tab Settings
On-screen gridlines in Word are useful for creating professional documents like reports and proposals, but they aren’t replicated in printed output. You need not suffer in any way as a result of this. Printing Word pages with their gridlines require some deft manipulation and the use of a graphics tool that is previously installed on your computer.
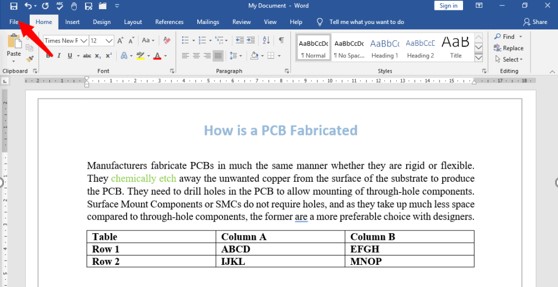
- Startup Microsoft Word. If you want to print a file that already contains gridlines, go to the “File” menu, choose “Open,” then locate the file on your computer and double-click it. When you first open Word, it just shows a blank page. Make as many edits to the text and media in the gallery as you like.
- Select the “View” menu. Mark the “Gridlines” option in the Show tab of the ribbon. Now that you’ve added the gridlines, your Word document will look like this, but the lines won’t actually print. Feel free to make any edits you see fit, such as arranging your photographs in a grid.
- Make use of the “One Page” option on the View tab’s ribbon to print a single page. As a result, you may view the complete Word file. To make a screen capture of the active Word document, press the “Alt” & “Print Screen” buttons simultaneously on your keyboard.
- Launch Paint by opening the Accessories subfolder. The gridlines from your Word document will be pasted in when you click the “Paste” button on the ribbon. Choose from the ribbon’s options. If you want to remove everything but the page from your Word document, you can do it by clicking the “Crop” button in the ribbon after you’ve drawn a rectangle around it. This is crucial if your screen capture in Word includes an extra monitor, the system tray, an IM window, or anything else. After the trimming is complete, you will have what amounts to a carbon copy of the gridlines in Word.
- Pick “Print” from the Paint button’s pull-down option. To print, pick a printer, a copy count, and then hit the “Print” button.
Process of Printing Gridlines in Tables in Word
You can access the table by opening the Word document. Border options can determine whether or not the table’s gridlines are displayed. In the top left and bottom right corners of the table, respectively, you’ll see icons when you hover the cursor over the table.

To access these options, right-click the symbol in the upper left corner.

To access this feature, open the menu and then click the triangle beside the border icon. You may access the border options by clicking here.

To reveal all the borders, select the option to do so. Pick the desired border style from the menu if you don’t want to see all of the gridlines or borders.
Borders & Shading exposes a submenu where you can modify the line weight, line style, and line color of the borders. You can view the margins on the page if you choose View Gridlines, but they won’t actually print out. This is what your table will appear like if you make the borders visible.
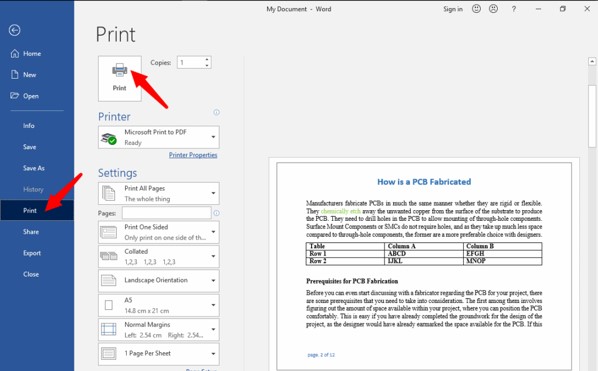
Select the File menu item from the main toolbar. The options for navigating and saving files become visible. Just select the Print menu item on the sidebar. When you choose the Print button, a preview with all the gridlines will appear, and you can print the preview.
Process of Printing Gridlines for Picture and Text Placement
To view the picture, launch the Word file and go to the page featuring the picture.

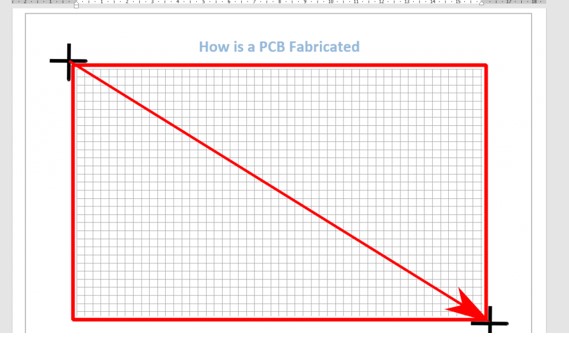
To activate gridlines, go to the View menu at the top of your screen and select Gridlines. This section of the website should now be a grid. This grid can be used for positioning text and images, but it cannot be printed. However, there is another way to have the grid printed on each page. Converting the grid into a picture is the first step toward this goal.

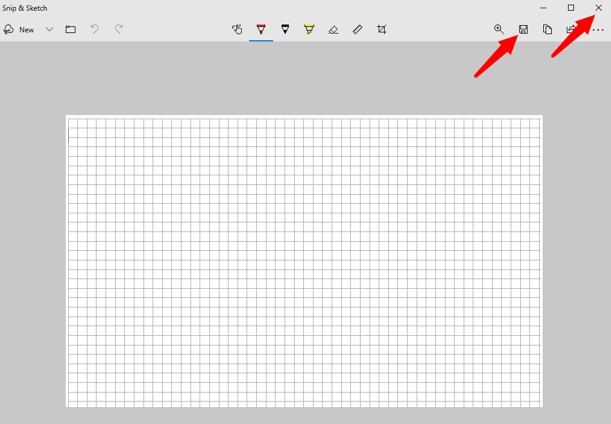
To capture a screenshot of a selected area of the display in Windows 10, press Win+Shift+S. This handy feature is part of Windows 10’s Snip & Sketch app.
A picture can be saved from the snapshot. Start with a blank page in your file and the gridlines turned on. If you hold down the Windows key and the Shift key while clicking the S key, your cursor will take the shape of a cross.
First, place the cross in the upper left square of the grid, and then, while holding down the left mouse cursor, move it all the way down to the lower right corner. Don’t hold down the mouse button any longer. Clicking this button will create a copy of the grid in the clipboard. The notification will flash briefly at the window’s bottom and then vanish.
Right-click the Windows notification area and choose to Snip saved to clipboard from the list of alerts that appears. The grid picture will load into the application Snip & Sketch.

Select Save as, then give the grid image a descriptive title and save it as a PNG file (example grid.png).
If you wish to add the grid picture to just one page of your Word document, continue with the instructions below. To insert a picture into your Word document, go back to the page you saved it on.

Select Insert from the main toolbar. To access Insert options, the ribbon shifts. Select Images, then locate the Grid photo you just downloaded and open it. As a result, the image will obscure what is on the page.

To access, select the icon located in the upper right corner of the grid. Options for the layout will show up. If you want the text to appear after the image, then choose that option. To dismiss the Layout Options dialog, select the X.

This is what the page will appear like after the grid image has been inserted. When you need to resize or relocate the grid, just click on the image & drag it to the new location. To deselect an image, click anywhere else on the screen.

Select the File menu item from the main toolbar. The options for navigating and saving files become visible. Just select the Print menu item on the sidebar. When you select the Print button, a preview with all the gridlines will appear, and you can print the preview.
Make printable gridlines in word
FAQs
How come gridlines aren’t being printed by my printer?
Is there a way to make gridlines appear?
Is there a key combination to activate gridlines?
Conclusion
Adding gridlines to a Word document is a great method to make the content more organized and straightforward to read. Depending on your needs, one of the three aforementioned ways how to print gridlines in Word will enable you to print your text with gridlines included.