Discord is getting attention rapidly from people as texting, calling, and screen-sharing platform. When you are in any Discord call or conversations, you will be assigned a role by the host or the owner. Every member and participant of the call, meeting, and whole server contains their role.
It is mainly decided by the host who will play which role in the Discord server. When it comes to how to make roles on Discord, the whole system and processes of these roles come in front. You need to learn Creating, Assigning, Editing, Managing, and Deleting roles to become proficient in this sector.

What Are the Roles in Discord Server?
Before going in-depth into the roles creating and managing process, you need to learn the meaning of roles in Discord. Roles mean which work or task has been assigned to any particular member on the server. The host of the server decides who will be given to play which role in the conversation.
This role distributing process comes in the sector of permission in Discord. If you are the owner or the host, you can assign the permission based on the server level and specific channel levels. There are a total of 29 types of permissions in the Discord server split among three different sectors.
The name of those three permission sectors on the server is General, Text, and Voice. The whole system of roles creating, assigning, editing, managing, and deleting are included in the General permission sector.
How to Make Roles on Discord – In-Detail Discussion
When in a call or conversation on the Discord server, every member carries their roles. The host and owner’s tasks are to create, assign, edit, manage, and delete roles in the server. Let’s talk about the whole process of the roles making below:
How to Create Roles on the Discord Server
When you are the host of the server, you need to create roles for the members, and the step-by-step process for that are:
Step-1: Entering the Server
The first step for you is to open Discord on your computer and log into the Discord account. Then, enter into your desired server or create a whole new server by yourself.
Step-2: Go to Server Settings
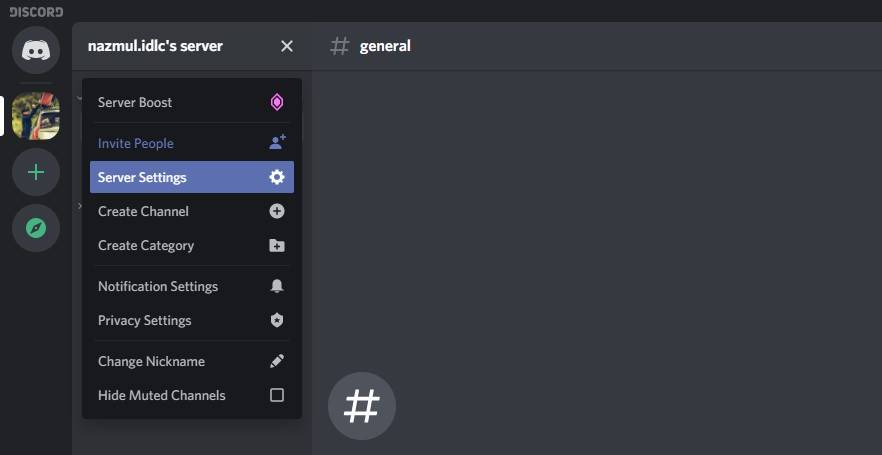
When in the call, meeting, or conversation on your server, click on the server icon on your screen’s left. Clicking there will open a new window having the server’s name at the top and a dropdown icon beside the name. When you press the dropdown icon, a new window will appear with the “Server Settings” option at the top.
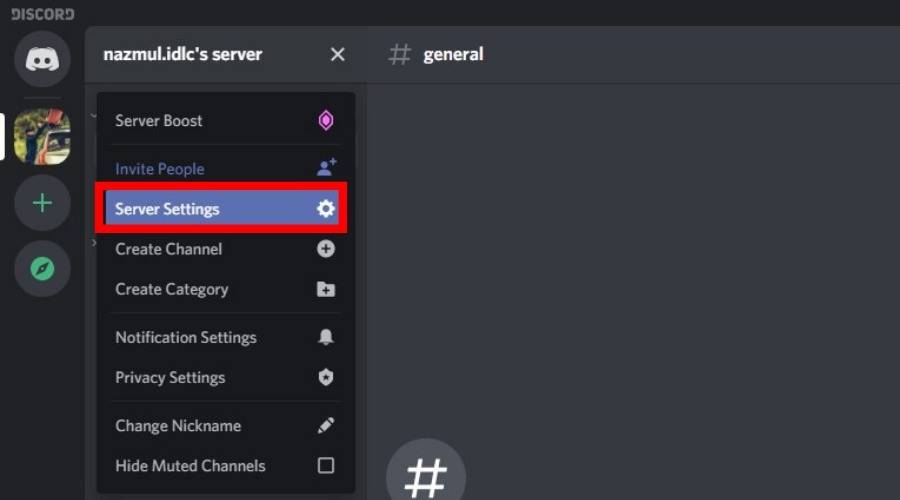
Step-3: Creating the Roles
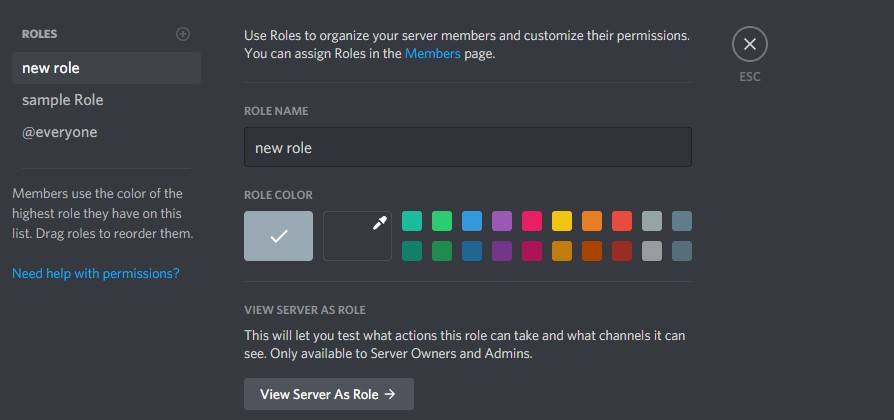
You need to press that “Server Settings” option, as a menu bar will appear right after you do so. There will be an option named “roles” and another option called “@everyone.” Next, you will see a “+” icon at the center pane’s top, click there, and a new window will come out.
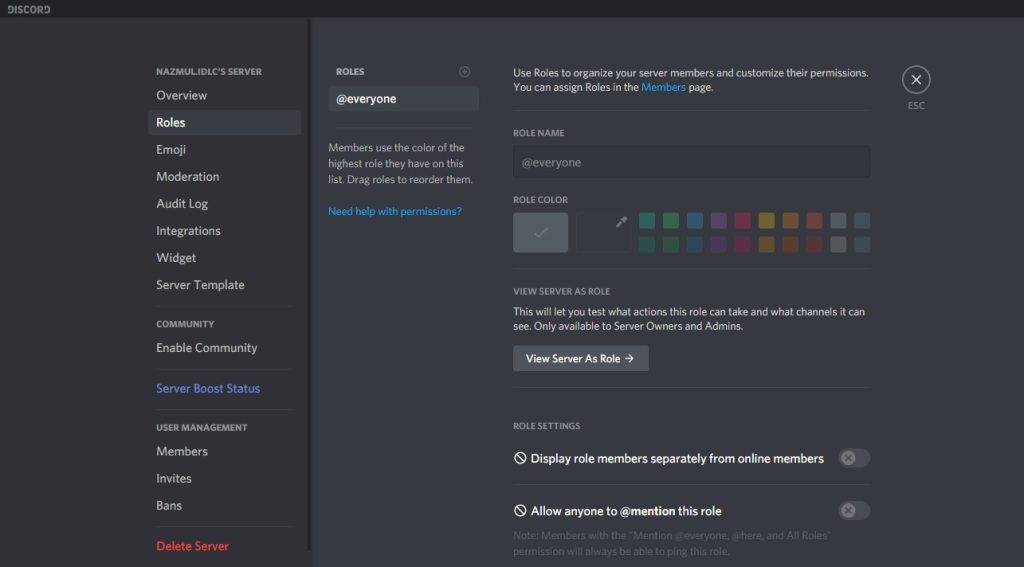
This window will require the role’s name and work, fill all those up to create any role, and put necessary information.
Step-4: Saving the Role
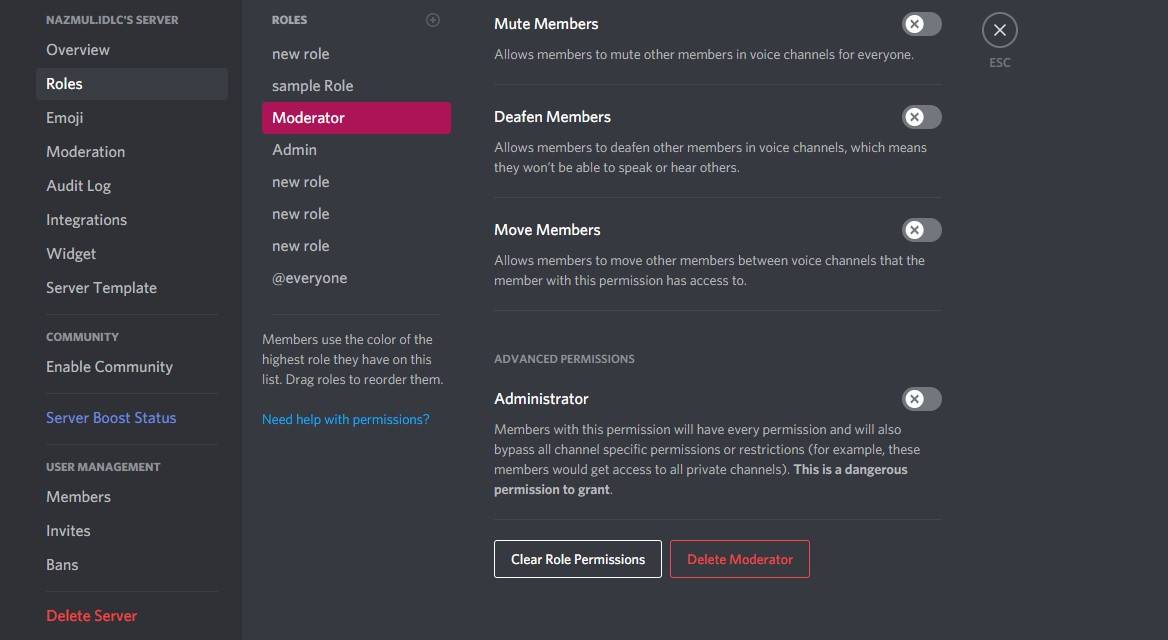
Then comes the term of saving the role you created just a bit ago. By clicking next, a page will appear before you in the device screen to review the 32 permissions. Review all of them again, and press “Save Changes” to save the role. Thus, you can create and save all the roles you want to make on your server.

How to Make Roles on Discord Mobile
Creating roles on Discord mobile is not tough as there isn’t much difference between mobile and computer versions. The necessary steps for making roles on Discord mobile are:
Step-1: Log in and Locate the Option Bar
Open the Discord app on your mobile phone, and log into there to use the platform. Create a server and join there to make a call or any conversation or meeting. Then touch the server icon, and an icon with three dots will appear beside the server’s name.
Step-2: Open Settings
Click on that three-dotted option icon, and a new window will pop up on your phone’s screen. The last of the four options will be “Settings,” also known as “Server Settings.”
Step-3: Role Creating
When you click on the settings option, a new page will come in front. You will see some new sections on that page, and at the bottom part, there will be a “Roles” option.
Click here to create the roles for the members of your server. Pressing the “Roles” option will bring a new page with having “Add Role” at the top. Name the roles you want for the necessity of managing your server.
Step-4: Role Creating Confirmation
After giving the role’s name, press the “Confirm” option to complete the process. Thus, you can create the roles on Discord Mobile without facing any hassles. When all done, all the discord roles names will be in front of you.
How to Assign Roles on Discord Server through Computer
When you complete the creation of the roles, you need to assign the roles to the members. The processes for that are:
Step-1: Open Server Settings
As you will be in the meeting or call of your server, click on the server icon situated left of your computer screen. Right-click on your mouse by taking the cursor onto the server’s icon. Then, a window will appear having the “Server Settings” option at the top.
Step-2: See the Member List
When you see the “Server Settings” option appearing, press there, and another page will come in front. That page will contain various sections along with “Members” at the bottom. As you will click there, all the member’s lists will appear along with their username.
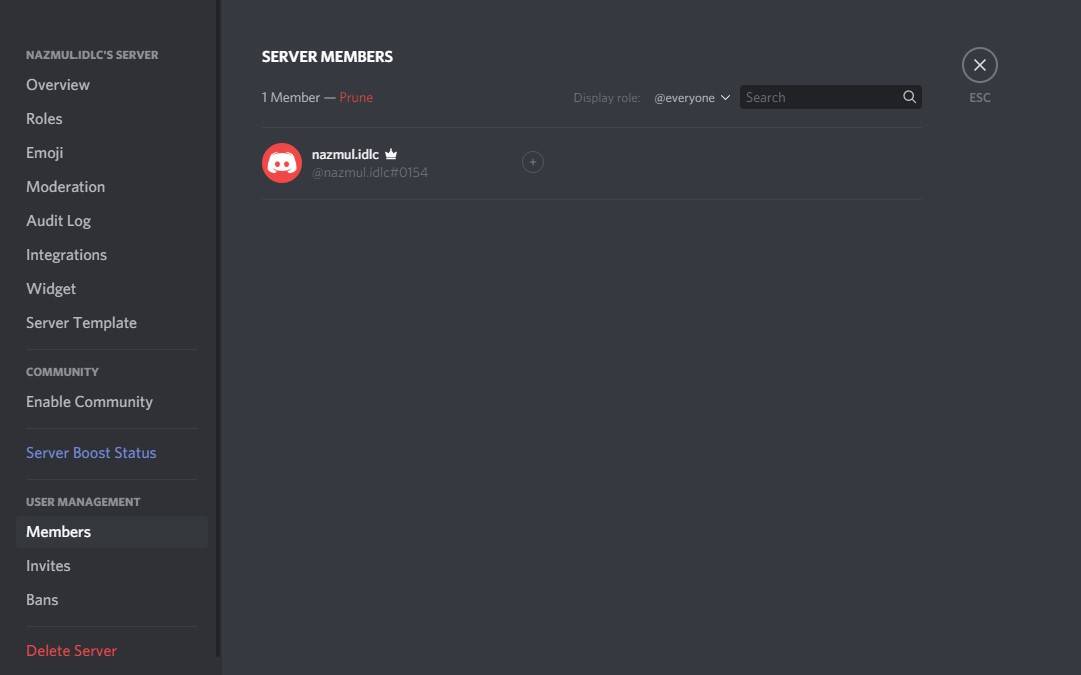
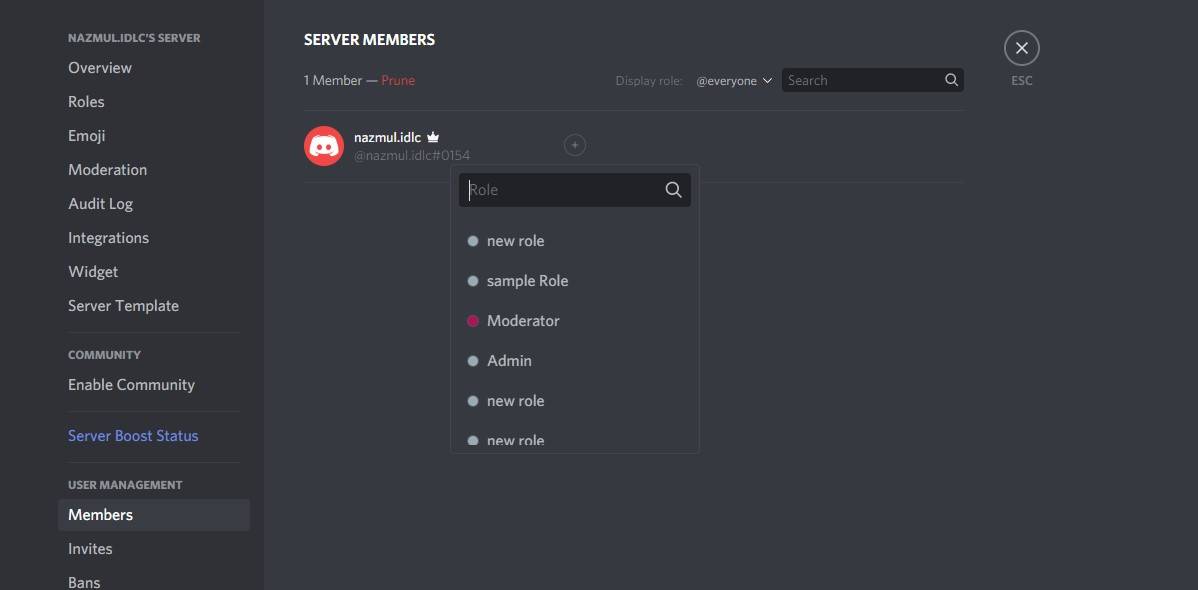
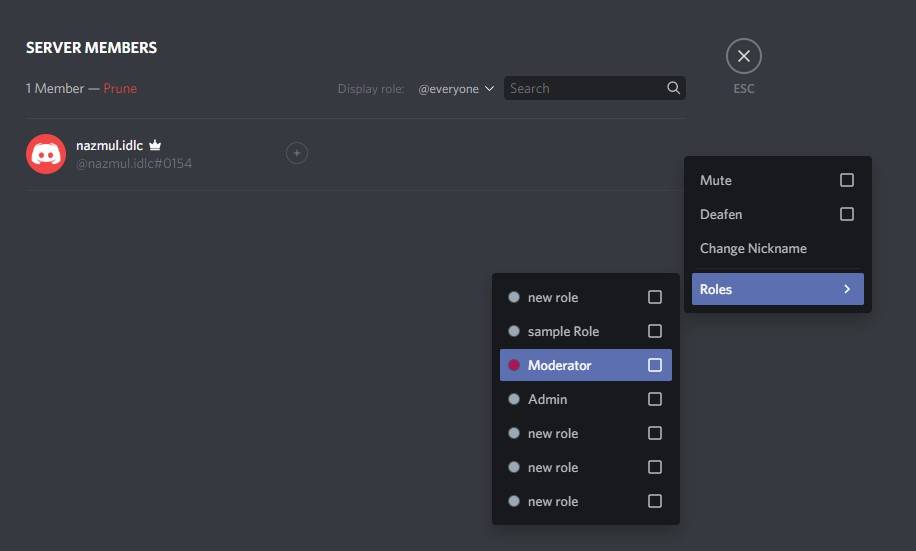
Step-3: Role Assigning
Select any member whom you want to assign for any role. There will be a “+” icon beside that member’s username on your server. Click that icon, and you will see the roles list will come in front that you created just a while ago. Then choose any of those roles that you want to assign to the selected member of your Discord server.
Step-4: Confirmation of Assigning
You need to make a confirmation of assigning by clicking confirm or OK button. When completed, besides the member’s username, you will find his/her role along with the selected color. In this process, you will learn how to make someone admin on discord, as you need to create an admin role and assign it to any member.
How to Edit Roles on Discord
When you create and assign roles, you may need to edit them as well, and the processes for that are:
Step-1: Find Server Settings
When on the server, click on the server icon to open up an options window. Click here, and a new page will come up containing “Server Settings” in the top part.
Step-2: Open Role Window
By clicking on the settings option, some sections will come up with the “Member” option at the bottom. When you press there, the role window appears.
Step-3: Roles Editing
In the roles window, you will see all the member’s names along with their roles.
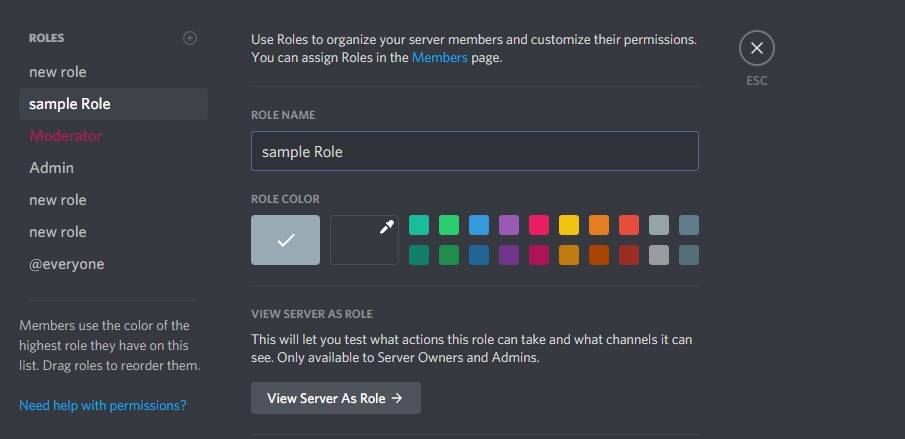
As you click on that member’s name, the edit window will be opened; you can make the necessary edit on that particular role.

How to Delete Roles on Discord
As you created and assigned all the roles to the members, you may need to delete roles for various reasons. The processes of that are:
Step-1: Access to the Roles Section
At first, open up the “Server Settings” option from the icon of your server. After that, click on the members section, and from there, you will see the role section.
Step-2: Delete the Role
In the role’s section, you will see the list of all assigned members to their roles.
From there, click on the role name that you want to delete, and the “Delete Role” option will appear at the bottom.
Step-3: Confirmation of Deletion
Then, the Discord will require your confirmation, and press “Delete New Role” to complete the process.
FAQs
How can I create roles on Discord?
First, open the Discord software on your device, log in, and create a server. When in a meeting, go to the “Server Settings” option, and click on Roles. There, you will find “@everyone” and a “+” icon for creating new roles. Then you can make the necessary number of roles you want.
What is the fundamental role creating process?
It is not all about creating your Discord server’s roles, and the job won’t finish with it. You also need to assign those created roles to the server members and manage the roles when necessary. Editing or deleting the roles are also necessary tasks to perform.
How many permissions are there in Discord?
There are a total of 29 permissions, and those are divided into three sectors named General, Text, and Voice permissions. All tasks about roles in your Discord server come in the General Permission section, and you need to review all of these.
Conclusion
When it comes to the matter of role-making systems and processes in Discord, it’s not just about creating them. Five different sections of Creating, Assigning, Editing, Managing, and Deleting of roles are also necessary. These many functions of roles will get you to know how to make roles on Discord.
When you are in a Discord server, it is necessary to create roles for the members. Creating and assigning those roles among the members will help to identify the member and task quickly. The fundamental role and associated system will enhance your Discord server using experience as well.