
To document articles, data, pictures, graphs, tables, and other materials, mostly everyone uses Microsoft Word. It’s the best application for creating reports, articles, and even books. When using Word, you may have challenges like How to Get Rid of Borders in Word. Pages, tables, specific cells of tables, images, texts, and drawing objects can all have borders. Knowing how to alter and remove them correctly helps speed up the writing process.
Removing Borders around a Page
Sometimes you may need to get rid of the page border inside your Word document. If you’ve applied a page border to your Microsoft Word document, change the page border setting to None to erase it. To remove a page border quickly, simply follow the instructions outlined below.
- From the Microsoft Word Ribbon, navigate to the “Design” tab and click on the “Page Borders” option in the “Page Background” section.

- Choose which page (or pages) you wish to clear the border from in the “Apply to” list in the “Borders and Shading” dialog box.
- Under the “Setting:” options, click on “None”.

Now you have successfully removed borders from pages. You can also apply these steps described above to modify page borders if you feel the need to.
Removing all Borders from a Table
When you insert a table into a Microsoft Word document, it comes with a simple black border around the whole table and every cell within the whole table. If you’ve added additional borders, you can erase all or parts of the table’s borders. Simply follow the instructions below to remove all of the borders surrounding a table effortlessly.
- Click on any cell of the table for selecting the table. This will enable a lot of options in Word that can help you modify your table.
- Click on the apparent “+” sign on the upper-left area of the table for selecting the entire table.
- From the Microsoft Word Ribbon, click on the “Design” Tab.
- Inside the “Borders” Section, find the “Borders” option with an arrow sign.

- Click on the “Borders” button to open a list of options available.
- Select “No Border” for removing all borders from your table inside Microsoft Word.
It is important to remember that removing all borders from a table should be done after filling the cells inside the table with contents. Otherwise, navigating between cells to insert data becomes quite challenging.
Removing Borders from a Picture
When it comes to images, removing borders around them has two different approaches depending on whether the border is picture style or a custom border. To remove all of the borders surrounding a picture, simply follow the steps given below.
- Select the image from which you wish to remove the border inside your Microsoft Word document.
- Navigate to the “Format” tab in the Word Ribbon and choose one of the options applicable:
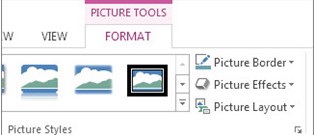
- When the border is an outline, you can choose “No Outline” from just the “Picture Border” option.
- If the border you’re trying to delete is of a style that you know, you can use it. Choose the style that’s been attached in the Picture Effects list, then choose No (style). To delete a shadow, for example, go to Picture Effects > Shadow > No Shadow.
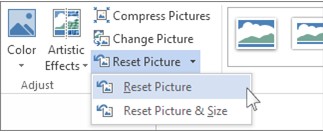
- You can reset the photo if you’re not sure what style is applied, but this will also delete any other modifications you’ve made. Select Reset from the Adjust group.
- Choose the image from which you wish to remove the custom border inside your Microsoft Word document.
- Select the “No Outline” from the Picture Border option offered in the Picture Tools Format tab.

You’ve now removed the borders from your pictures. You may also use the procedures outlined above to modify the picture border inside the Microsoft Word document in any way necessary.
Removing all Borders for Text
Microsoft Word allows you to set borders in your text to make them stand out. You can create borders around text to mark important information and attract your readers’ attention. For removing the borders from any text, simply follow the steps below:
- Select all the text inside the border with your cursor.
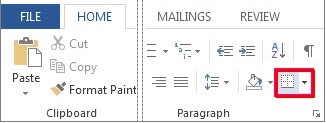
- In the Ribbon, go to the “Home” tab and Navigate to the “Paragraph” group located in the middle of the ribbon.
- Open the “Borders” list inside the “Paragraph” tab.

- From the drop-down menu, choose “No Border” to remove borders around the text.

Removing Part of the Border around Text
Sometimes you may need to keep parts of the border around your text. Either to make them stand out or give your texts a personal touch. For removing part of the border around a text, follow these easy steps:
- Using the cursor, select all of the text inside the border.
- In the “Home” tab in the Ribbon you will see the “Paragraph” group.
- Inside the “Paragraph” group, click on the “Borders” list.
- In the list of borders, click each border side you want to remove.
Removing a Border from a Drawing Object
Microsoft Word allows you to insert drawing objects into your document. You can set borders around your object to make them noticeable. But if you have to remove borders around any drawing object, follow the steps given below.
- In your document, choose the object with a border that you wish to delete.
- Select Format Drawing Canvas from the shortcut menu by right-clicking the drawing canvas.
- Depending on the version of your software, use one of the following:
- Select “No Line” under “Line Color” and Clear All Selections under “Line Style” in Word 2010.
- Click “No Color” under Line in Word 2007’s Colors and Lines tab.
How to Remove Page Border in Microsoft word Document
Conclusion
Although Borders are an easy way to make something noticeable inside Microsoft Word, for various reasons, you may need to remove them. Knowing how to remove borders from pages, tables, texts, pictures, and objects easily can save you a lot of time without having to try out every option available. Following the guideline mentioned above, you can remove borders from just about anything with a few clicks.