
Sometimes you require to split your text (or a section of it) into concurrent columns, and Word makes it a breeze. Whenever you divide the text into columns, you’ll see that it naturally continues in the column to the right. Any portion of your text may be extracted independently. This may help you organize your concepts and make your newsletter, research paper, or other writing projects more readable. Find out precisely, how to make 3 Columns in a Word document.
Process of Making 3 Columns in Word
It may be necessary to utilize more than two columns to properly organize your material. One of Word’s most impressive features is the ability to divide the document into three or more columns. The steps you should undertake to do this are detailed beneath.
Get the file you wish to change open. Simply choose the text you wish to divide up and click the “Columns” option.

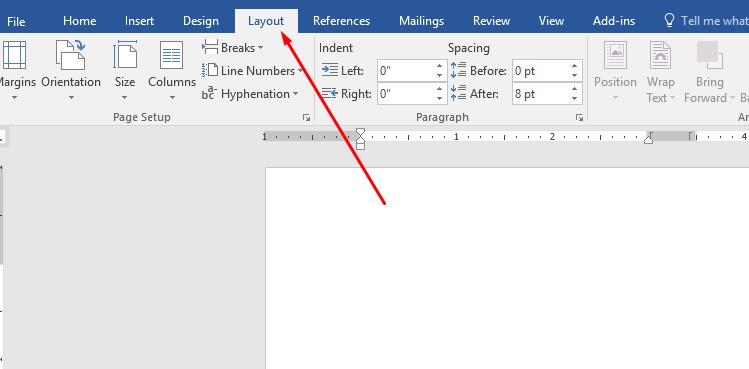
When you have finished selecting the text that you intend to break into columns in Microsoft Word, hit or press the Layout button that is located on the ribbon interface.
After that, go to the Columns option located in the Page Setup area of the Layout tab by clicking or tapping on it. This will provide a choice of alternatives for you to pick from, from which you will be able to choose the number of columns into which you would want to break your text. Initiate action by selecting 3.

The text that you have picked will automatically be divided into three columns as soon as you choose option Three.
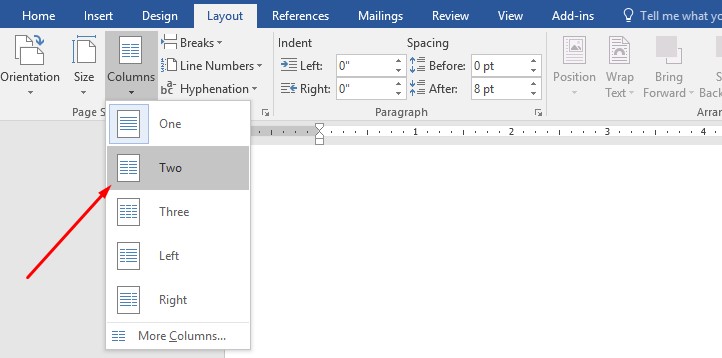
Process of Making 2 Columns in Word
Before you can begin to divide the content of your text into two columns, you will need to either open an existing file in Word or build a new one & include some text in it. When you have finished selecting the content that you wish to separate into columns in Word, hit or press the Layout tab that is located on the bar menu.
After that, go to the Columns icon located in the Page Setup area of the Layout tab by clicking or pressing on it. Clicking this will bring up a menu out of which you can select the number of columns into which you’d prefer to divide your content. Make your selection by pressing or clicking on 2.
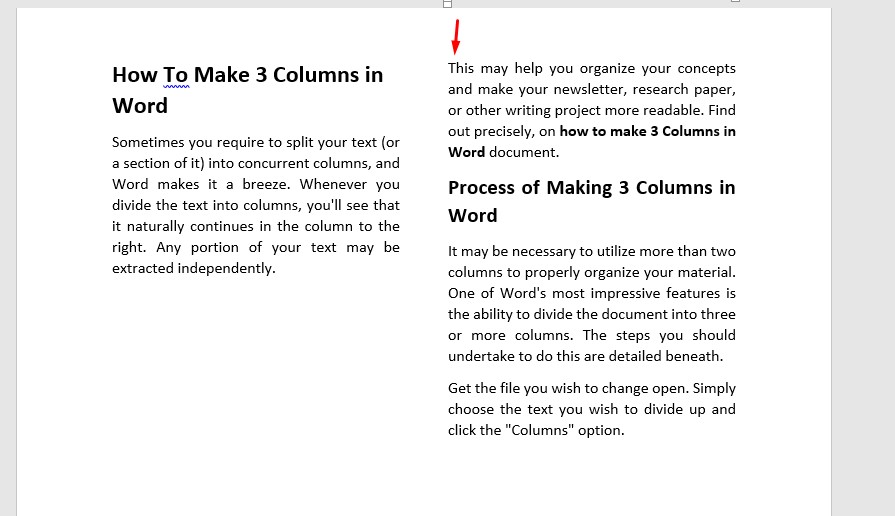
Below is a screenshot showing how Word automatically produces two columns and enables your content to flow between them.

You may then start composing new content anyplace in the document’s columns, and it will automatically fill up the empty spaces between them. This rhythm, though, may not be to your taste. See the next section if you need to pinpoint the precise position at which a column splits off.
Process of Making 4 or More Columns in Word
There is a possibility that your writing might need greater than two or three columns. It is fairly simple to put into action; all that is required is the addition of two or three columns.
Firstly, your document has to be opened, and then you need to pick the text that will be used for the columns. After that, proceed to the Layout tab, and then look for the Columns option. If you require more than three columns and you decide to click or touch the More Columns button, then Word will create a new window for you that is labeled Columns and it will provide extra options. Find the setting there that’s named “Number of columns,” and change it. After entering the desired number of columns, you should hit the OK box.

Word instantly divides the text you have chosen into the number of columns that you have set. For instance, the result that we received when we decided to divide the content into four columns is as follows:

Process of Adding Column Breaks
You have the ability to regulate precisely where one column starts and another one finishes if that is something you wish to do. Column breaks, an in-built feature of Microsoft Word, accomplish precisely this goal. To insert a column break, you must first select or press at the commencement of the content where you want the new column to appear.

Following that, launch Microsoft Word and navigate to the top menu. Once there, select the Layout option by pressing on it.
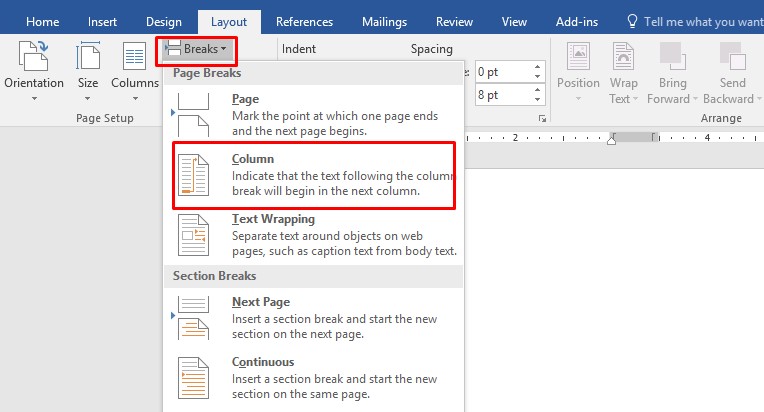
Hit or press on the Breaks option that is located in the Page Setup area of the Layout tab. This function displays a list of possible layouts for the Page Breaks & Section Breaks that you have chosen. To use it, hit or press the Column button.
After you have completed the steps outlined above, as you will observe in the demonstration, Word automatically places the beginning of the subsequent column at the location you specified.
Conclusion
Whether you are composing a research paper, an essay for the newspaper, or something else, dividing the material that you are writing into many columns will give it an attractive appearance. This article on how to make 3 columns in Word will assist you in doing that as well as other tasks, such as determining the location of column breaks.