Windows systems security significantly depends on the Windows update. But many of us overlook this update.
If you follow the script correctly, windows will provide your system with a premium level of security. For this, you have to allow Windows to take periodic software updates. If you don’t allow regular updates, your windows will get affected by bugs and holes easily.
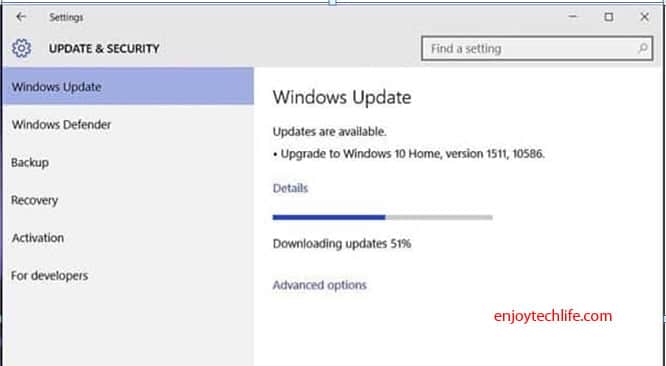
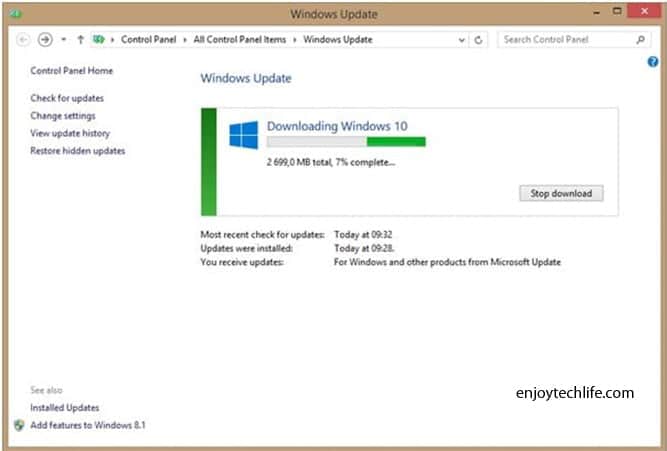
Windows features continuously take updates. And while taking updates, it often gets stuck to different percentages. Many of us face these types of problems. This article will share a few effective fixation processes on Windows 10 update stuck at 0%.
So, let’s start fixing the problem.

Different Methods of Fixing Windows 10 Update Stuck at 0%
Windows 10 update stuck at 0 blue screen problem is often frustrating. Several methods are out there to help you eliminate this problem.
Below are a few fixation processes that need to follow meticulously.
Fixation Process 01: Wait it Out
This fixation process is easy, but it isn’t very pleasant for many people because very few of us love to wait. But sometimes, it may happen that the Windows 10 update gets stuck at 0 blue screens, and suddenly, the update jumps to a higher % automatically.
With a bit of practice of patience, you can quickly resolve this problem. Often windows updates will take time, and the installation process may become longer. All you need to do this wait and give the required time to the installation process.
However, if you don’t see any changes in the installation process after 24 – 36 hours, follow the next fixation process.
Fixation Process 02: Running Windows Update Troubleshooter
Microsoft Windows Update troubleshooter notifies a user of some problems in your system.
Generally, the troubleshooting process takes a few minutes to diagnose your system. At the same time, after detecting the problem, it will automatically repair the problem. This solution is much more effective and easy to follow.
Step 01
Visit the support page of Microsoft.
Step 02
You will find Windows 10 Troubleshooter tool on the support page and download it.

Step 03
The troubleshooter option will have a popup saying, “Apply repairs automatically” – click on it.
Step 04
Run the Troubleshooter. As I stated, the troubleshooter will automatically detect and repair the problem.

This tool will provide a great result, and the best thing about this tool is even if it can’t resolve the problem, it will highlight the problem and assist you in following the right direction.
Fixation 03: Windows Update Service Restarting
This fixation process will work effectively if your computer has not taken updates for an extended period.
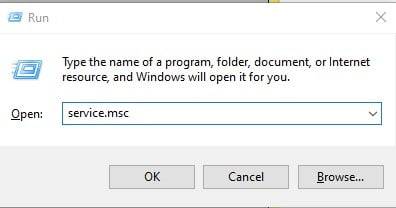
Step 01
You will need to open the Run dialog box. Press and hold “Windows + R.”
Step 02
On the search space, type “Services.msc” and click OK.
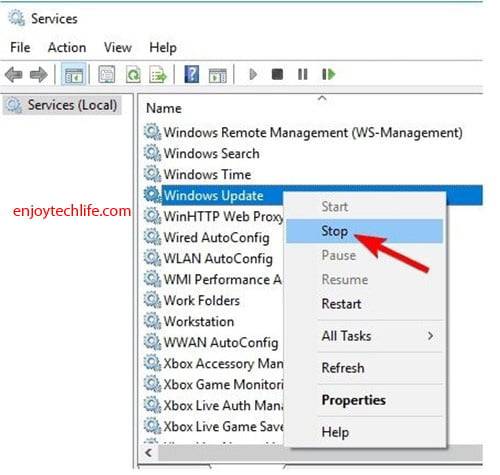
Step 03
A service list will appear, and from here, locate the “Windows Update” service.
Step 04
Hover the mouse on the “Windows Update” option and give right-click. A popup window will appear, and you must select “Stop.” Now Windows Update will not take unless you Start it again.
Step 05
Open Explorer. You can follow the shortcut key “Windows + E.”
Step 06
Navigate to the mentioned directory in the image: “C:\Windows\SoftwareDistribution.”
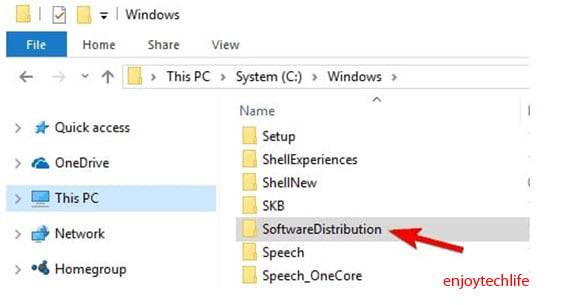
Step 07
Copy and paste the address into the Windows Explorer Address bar, and thus the window will be opened.
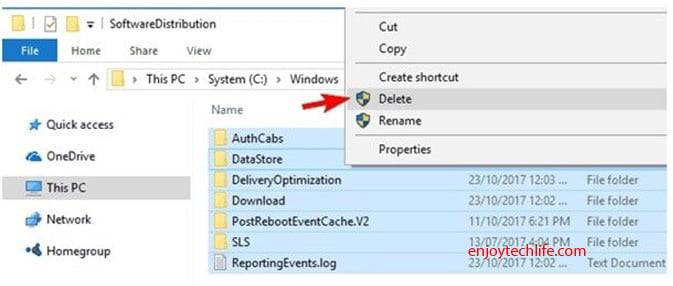
Step 08
We will delete all the files in the software distribution folder. To do this, press Ctrl + A and select all the files, then hit the right button and delete the files.
Step 09
Your computer needs to be restarted.
Step 10
Again Open the service window and choose to go to the Windows Update folder.
Step 11
In this step, we will turn on the Windows Update option again. Press the right button while placing the cursor on Windows Update and click Start.
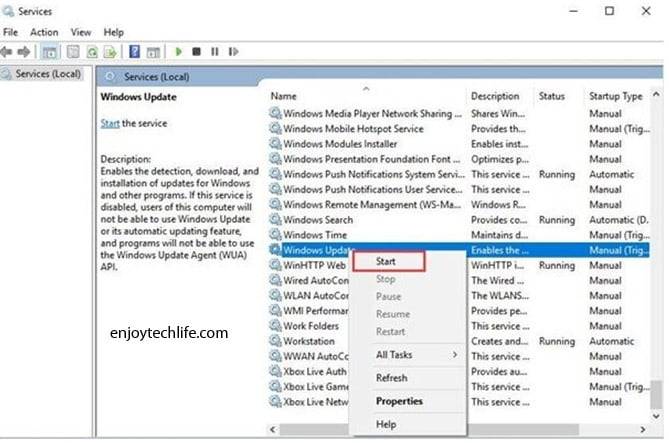
Step 12
To check whether it is running or not, check the Status column.
Isn’t it a simple fixation process? Following this process, many users can get rid of the configuring Windows 10 update stuck at 0 problems. However, for unlucky users, continue reading the article.
Fixation 04: Checking Disk Space
Windows Update process will be slow or not proceed to the next step if the disk space is less. You must have 10GB of disk space to get a successful Windows Update.

If you are short of sufficient disk space, follow the below steps.
Step 01
Go to the Settings option and select System.
Step 02
Select the Storage option.
Now you have 2 choices. Select “Free up space now” and check which items are unnecessary and which you want to delete.
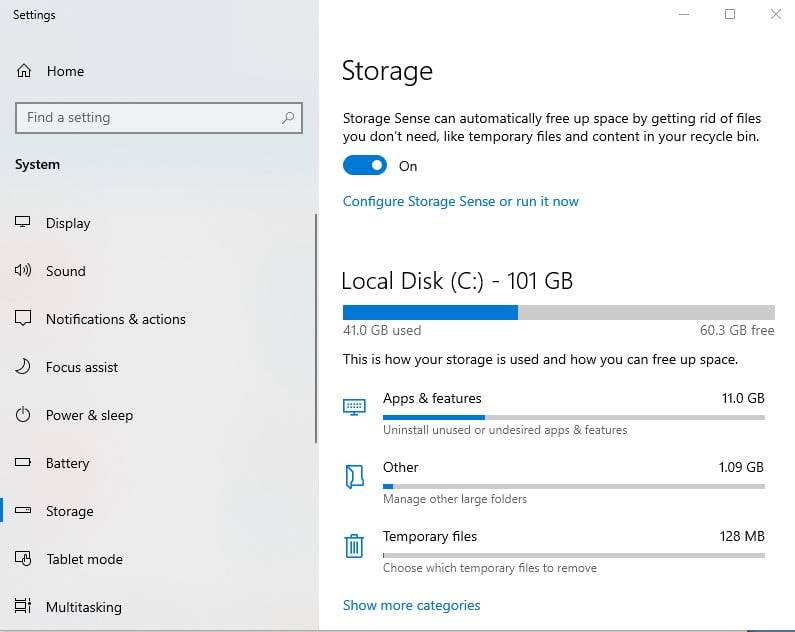
Or, look at the “Delete temporary files that my apps aren’t using” option.
Step 03
Now below the “Storage Sense” option, select the “Change how we free up space automatically” option.
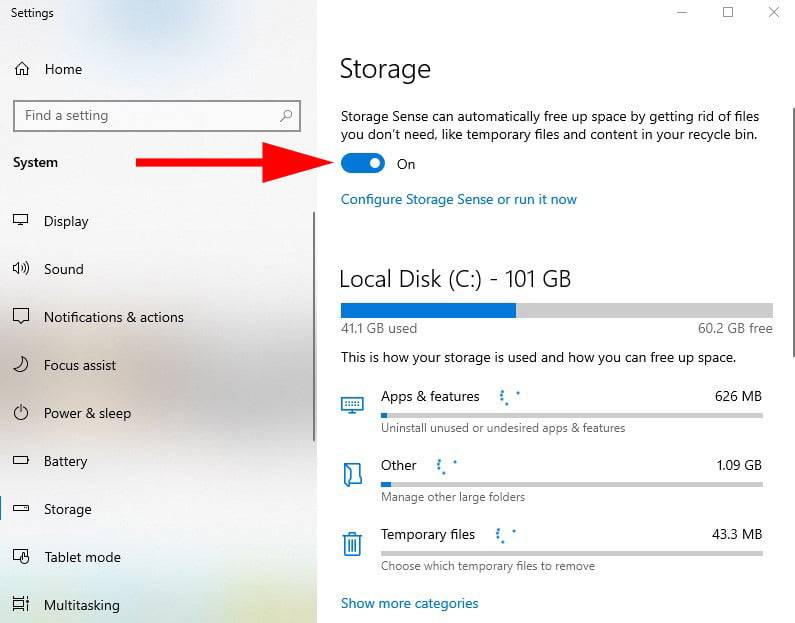
Step 04
A drop-down menu will appear where you must select how often to delete. The range is 1 – 60 days.
The process is complete, and I believe you will never face Windows 10 update stuck at 0% problem in the future. However, if the problem still exists, below is another fixation process.
How to Fix A Stuck Windows 10 Update at 0%
Fixation Process 05: Temporary Turning Off the Windows Firewall Option
Sometimes, Windows Firewall treats Windows updates as an unknown agent and blocks the installation process.
At this point, turning off the Windows firewall option temporarily is a good solution. But make sure you turn the option ON again to avoid further problems.
Below are the steps for tuning the Windows firewall option off.
Step 01
Press the Windows + R key to open the Run dialog box.
Step 02
“firewall.cpl” type these words in the search box and hit Enter. You can follow another option too.
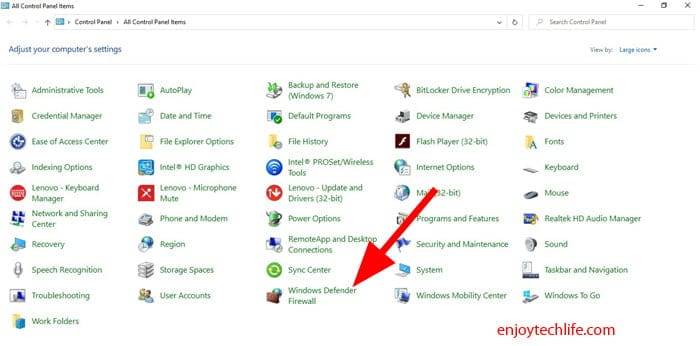
Go to the Control Panel and select “Windows Firewall.”
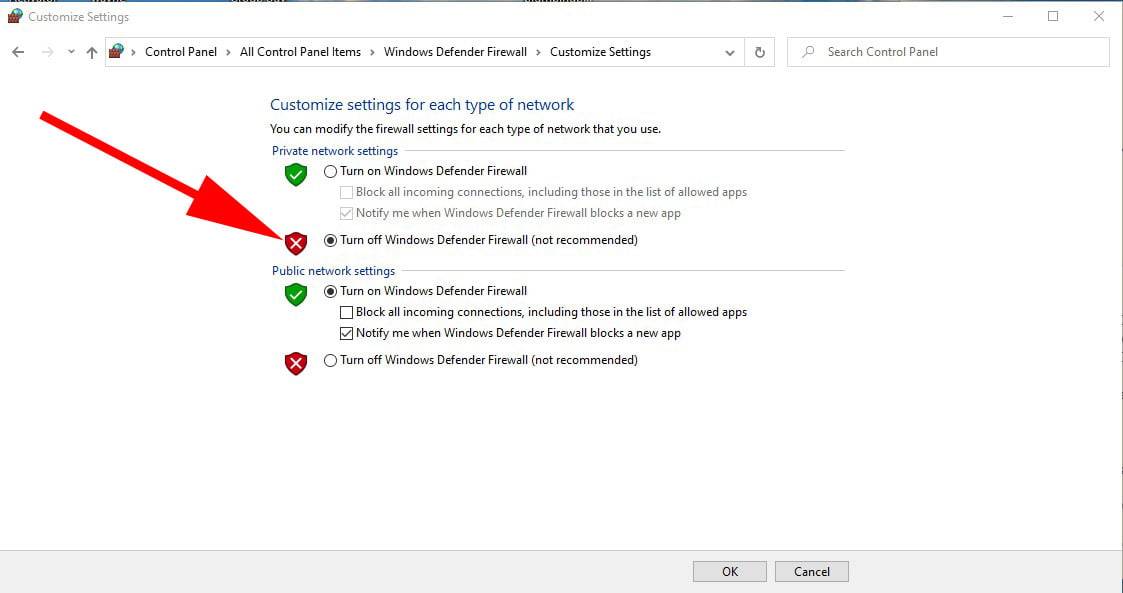
Step 03
Once you enter into the Windows Firewall, you will find an option named “Turn Windows Firewall on or off” on the left-hand side.

After clicking on this option, you will have 2 sections.
- Private Network Settings
- Public Network Settings.
Select the “Turn off Windows Firewall (Not Recommended)” option and click OK.
Step 04
Now return to the Windows Update option and press “Check for updates.”
Final Words
Are not the solutions straightforward?
I believe all the above-discussed fixation processes are easy to follow. I have discussed several solutions to the Windows 10 update stuck at 0% in this article so that if any problems don’t go with you for any unfortunate reason, follow another solution.
If you find this article useful, don’t forget to share it with your family, friends, and colleagues.
Your valuable comments in the comment box will always be welcomed.