
Service Host (Svchost.exe) is a program that assists in the hosting of Windows services. In Windows 10, you may access Windows Services to monitor, activate, stop, and deactivate specific Windows services. In Windows 10, Svchost.exe may utilize up to 100% internal storage, processor, and RAM. This article will walk you through the various options for resolving Service Host Windows Update causing high CPU usage to improve the performance of your computer.
What Is Service Host in Windows?
Stand-alone commands are apps and programs that may operate independently on your computer. On the other hand, many services are DLLs (Dynamic Link Libraries) that lack all of the necessary information to function independently. To launch and operate on your PC, these DLLs require a Service Host.
Service Host aids in the “hosting” of specialized services on your pc. These services are typically meant to operate in the background and not create any issues, but Service Host programs might become damaged and start using more processing power than they should in some circumstances.
Remember that the error is usually caused by one of the Service Host processes rather than the Service Host itself. That doesn’t imply you can turn off and remove the service. Many essential services in Microsoft Windows require the Service Host program to function. Your system might become volatile if you remove some of these.
Methods to Fix High CPU Usage due to Service Host Windows Update
There are several options for resolving this issue and improving the performance of your PC. The methods are outlined below.
Method-1: Run Virus Scan
If your pc is attacked with a virus or malware, svchost.exe CPU utilization might reach 100% in Windows 10. The first step in correcting this problem is to perform an antivirus scan on the system. To detect and remove viruses or malware on your computer, use Windows Defender or another reputable third-party antivirus program.
Method-2: Deactivate Services that Cause Svchost.exe to Consume Higher CPU
To repair this problem, locate the problematic svchost.exe apps or services that are causing your Windows 10 PC to run at 100% CPU utilization and deactivate them.
Step-1: Launch Task Manager.
Step-2: Browse the Details tab to discover the svchost.exe processes in the list. Locate the svchost.exe process that consumes a lot of CPU and right-click it. Select Go to service(s) to open a window with marked services that operate beneath this svchost.exe activity.

Step-3: To end a process, right-click it and choose Stop from the options.
Step-4: Halting the service in Task Manager will only deactivate it for a short time. You may click the malfunctioning service and then click the Open Services button at the bottom to launch it in Window Services after you’ve found it. Choose Properties from the menu bar when you right-click the service. To permanently disable it, select the Disable option next to the Startup type. Finally, click OK before restarting your Windows 10 device to apply the modifications.
Afterward, you may see if the svchost.exe excessive CPU use issue in Windows 10 has been resolved.
Method-3: Delete the logs in the Event Viewer
Cleaning Windows Event View logs is another approach to try to address Windows 10 svchost.exe excessive CPU use.
Step-1: To launch Run, press Windows+R on your keyboard. After that, type eventvwr to access Windows Event Viewer.
Step-2: Next, go over to Windows Logs and then to Application. To erase Application logs, select Clear Log.
Step-3: Clearing the System, Setup, and Security logs can be done in the same way. Finally, reboot your Windows 10 machine to have the adjustments take effect.

Method-4: Deactivate Programmed Windows Updates
The svchost.exe high CPU utilization problem in Windows 10 might occur while Windows Update is checking for new updates or downloading them in the background. Block automatic Windows updates if you want to.
Step-1: To launch Windows Services, use Windows + R, input services.msc, then press Enter.
Step-2: Locate the Windows Update service and choose Properties from the options.
Step-3: In Startup type, select Disabled. Reboot your pc after selecting OK.

Method-5: Ensure Windows 10 Is Updated and Execute Update Troubleshooter If Required
The Service Host will often display the name of the program that is utilizing it. However, in certain situations, Windows Update might lead to issues with the Service Host process, and you may not realize it. Your system may require an update.
To test if Windows Update is leading Service Host to consume too much CPU power, consider directly updating the system and letting it run overnight. This will allow you to determine whether the problem has been fixed and whether a stalled or missing update has been completed.
Take the actions outlined below to troubleshoot Windows Update.
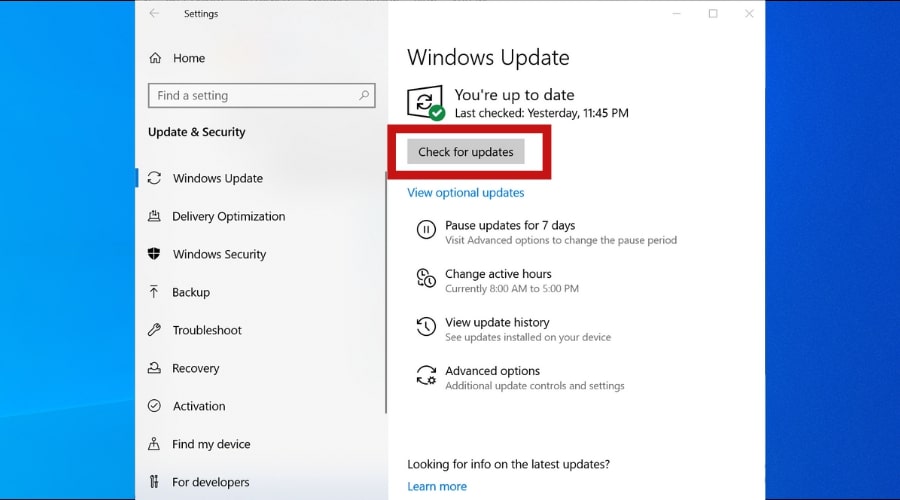
- Launch Windows Update app.
- Next, select “Check for updates.”
- Return to Windows Update and choose “Troubleshoot” on the left menu after completing a manual update and letting it run overnight.
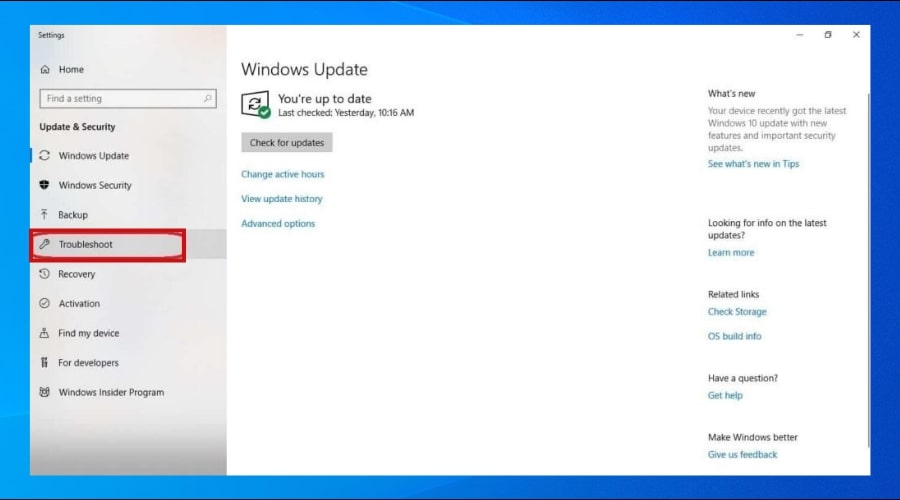
- Windows Update will start looking for issues. To fix them, implement the onscreen instructions.
Method-6: Launch the Command Prompt to Perform Check Disk
Many instances of an app or service in Windows 10 utilizing excessive CPU power are caused by corrupt files. Follow these procedures to examine your computer’s disk drives for discrepancies:
- Pick “Run as Administrator” from the start menu and press Yes to grant the software permission to make adjustments and return to the Command Prompt.
- Enter chkdsk c: /r at the prompt. If you wish to check the disk for a different drive, type the drive’s letter. Then tap the Enter key.

- You will be prompted to restart the system. Press [Enter] after selecting Y to reboot. This procedure might take some time, especially if you are doing it for the first time. Windows, on the other hand, should immediately correct any problems it discovers.
Conclusion
Occasionally, you will run across problems with your Windows system that will compromise your user experience. Service Host Windows Update, which causes excessive CPU use, is one such issue that might irritate you. Hopefully, the many solutions mentioned in this post may assist you in quickly resolving the problem.