
When using Microsoft Word, we frequently run across issues. The formatting may not function, the bullet points may not line correctly, or the document may not appear properly. When you’re working on something crucial, it’s easy to become frustrated. Knowing how to repair Microsoft Word Bullet Points Not Working can help you save time and accomplish your task more quickly.
How to Create Bullet Style
Creating a personal bullet list style can assist you in organizing your contents in your papers whenever you need to utilize bullets. The instructions outlined here will assist you in styling your bullet in whichever way you deem fit.
Step-1: Create New List
To design your list design, head to the Home tab and then Paragraph block. Then, select Define New List Style from the Multilevel List menu.

Step-2: Give your List Style a Name and Format Numbering
After choosing Define New List Style, assign your list style a name so that you can quickly identify it in future documents. You may call it anything relating to the paragraph styles you’ll be using. ListBullets is the name of the style in this tutorial. Next, select Numbering from the Format menu.

Step-3: In the Multilevel list, organize all layers of bullets
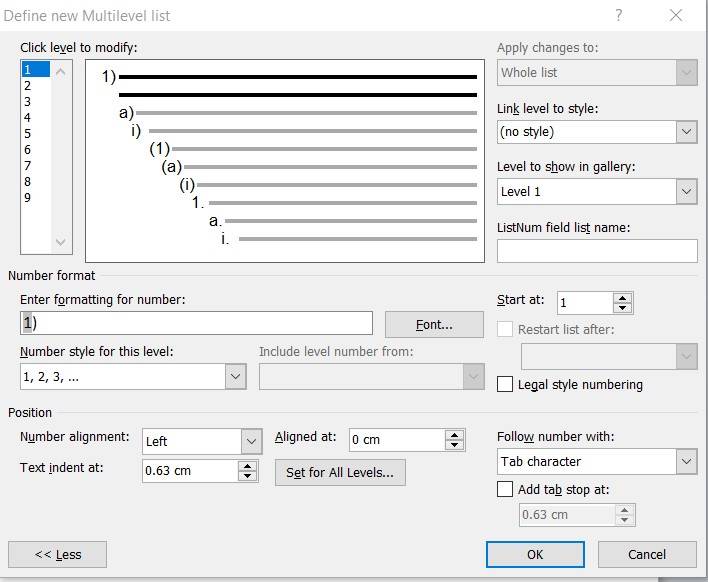
When you choose numbering under the Format options, Modify Multilevel list will appear. In that box, press More. Next, for the first five levels of the list style, apply the List Bullet paragraph style.
Pick level 1 from the ‘Click level to modify’ option. Select List Bullet from the ‘Link level to style’ menu. The paragraph style List Bullet is now attached to the list style’s first level. After that, under the ‘Click level to modify’ list, select level 2 and apply style List Bullet 2. Similarly, do this for levels 3, 4, and 5.
Step-4: Select Bullet Design
Beneath the ‘Click level to modify’ menu, click level 1. Choose the bullet shape you prefer in the ‘Number style for this level’ section as you proceed down the list. Repeat the same for level 2 and all the levels till level 5. Update the “Number style for this level” to none for the remainder of the levels and remove everything from “Enter formatting for number.”
Step-5: Manage Indents for your bullets in all levels
In reality, the default indents are completely appropriate. If you wish to change them, you have two alternatives. Using the “Set for all levels” option is the best approach. Set for All Levels box will appear.
Setting the ‘Aligned at,’ ‘Text indent at,’ or ‘Add tab stop at’ boxes separately is the problematic method. Keep in mind that everything is estimated from the margin.

Step-6: Confirm your settings
The process of building your own bullet list is finished once you’ve added the required indent space and chosen a bullet shape. To confirm your selections, press OK. This is how the final settings will appear.
How to fix bullets in Microsoft Word
Add the Personalized bullet list to Home tab
In Microsoft Word, you can quickly access the newly modified List Bullet from the Home tab. You may accomplish this by incorporating it to the gallery of quick styles. The List Bullet will then be displayed under the Home panel. The bullet will be visible in the thumbnail. You can do this by right-clicking on the name of the personalized bullet list in the Styles panel, then choose Add to Quick Styles from the menu bar. This is how it will appear in Quick Styles.
How to Add a Sub-bullet
Drag your pointer on the section of the text you wish to indent to create a sub-bullet. Click the ellipsis (…) next to the list buttons on the Home tab (as seen below), and afterward, Increase List Level.

How to format bullet points on Word
The bullet library is a subcategory of the font libraries that come with Microsoft Word. This implies you may customize your bullets with a different character. You may, for example, convert your dot bullets to arrows or even a € or $ figure. You may also use an image that you have on your computer or that you discovered on the web.
- To select all of the bullets in a list, first, click on one of them.
- Then, next to the bullet icon, press the down arrow.
- Choose Define New Bullet at the bottom of the panel.

- Select Symbol to modify or add a character. Pick a symbol from the symbol library and click OK. After selecting a new character, hit Font to alter the font characteristics. After making changes to the design, size, and font, press OK.
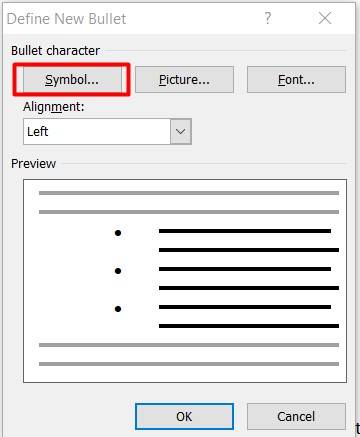
- Click Image to upload a picture. Click From a file to find photos on your computer, or an Image Search to discover an image on the internet in the Insert Pictures window. Select a picture from your PC or a Bing search and then press Open or Insert.

- Click OK if the preview of your new bullets appears adequate. Your bullets will be structured for you, and you are encouraged to be as innovative as you wish with them.
How to Solve Bullet Characters displaying empty boxes
Bullets are represented as empty boxes. When you use the Marlett typeface to construct a bulleted list, Word either adds at least one box or a bullet and a box symbol instead of a single bullet. Click Symbol (Insert menu), choose the Symbol you prefer, and then hit Insert. It’s possible that the text indentations will need to be adjusted. You may also insert a bullet with a different typeface.
Conclusion
Bullet points are commonly used to make your writing more presentable, emphasize essential information or material, summarize something, or illustrate procedures. When utilizing bullet points, you may run into issues, and they may not perform as well as you would want. Creating your own custom bullet style is an excellent approach to solve Microsoft Word Bullet Points not working. Following the procedures indicated above will assist you in resolving any bullet point concerns.