Are not you satisfied with windows 10 pro features? And now, looking for an option to downgrade your operating system?
Windows 10 launched with 2 versions. One is Windows 10 Pro, and another one is Windows 10 home. Windows 10 pro is for those who want advanced features such as Domain Join, Group Management Policy, Remote Desktop, BitLocker, and device Guard.
But unfortunately, some users are dissatisfied and now looking for an option How to downgrade Windows 10 Pro to Home. Let’s give a dive
Except for this to the versions mentioned above, there are other windows OS also available, which are Windows 10 mobile and Windows 10 mobile Enterprise. As the name said, these two versions are for Windows Mobile.
Every Windows version has a unique KEY to activate it. Let’s say you are already using an activated windows 10 home version, and suddenly it got upgraded to Windows 10 Pro, but you have to have an activation key to activate it. But these activation keys are quite expensive to get.
So, it is the best option to downgrade windows 10 pro to the home edition again since you have a valid key for the Home edition.
In the basic windows 10 version, you will get numerous features to provide you with a better experience. Significant features are the full version of Cortana, revamped start menu, and many more.
Now even still some people are trying to return we guess windows didn’t imagine it and hence haven’t made superior necessities for it.
So, inappropriately, the only option we are left with is a clean install. But other than that, you can also be concerned about testing your luck with a few different ideas.

Follow step by step on how to downgrade the windows 10 version
Step 01:
Before going for the action, it is essential to keep a backup of your all data. Do not let the downgrade go in vain because after the downgrade, if all data get erased, then there is no point in going for the downgrade. So, it is a wise decision to take the backup first.
Step 02:
Make sure that a valid license key of windows 10 home edition is available to you. Otherwise, you are wasting your time unnecessarily. Even, other Windows version key is also not workable for Windows 10 Home version.

Step 03:
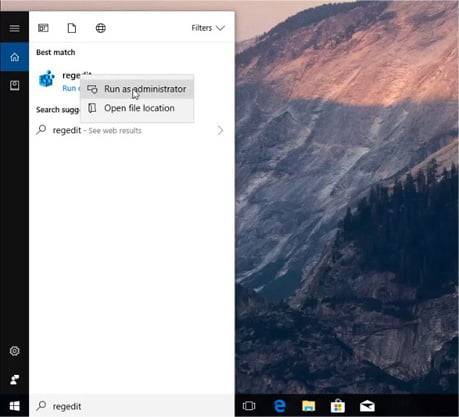
Go to the search option and write Regedit there. Then run it as administrator. The registry editor will appear.
Step 04:
Then you need to go to the “Computer\HKEY_LOCAL_MACHINE\SOFTWARE\Microsoft\Windows NT\CurrentVersion.”

Step 05:
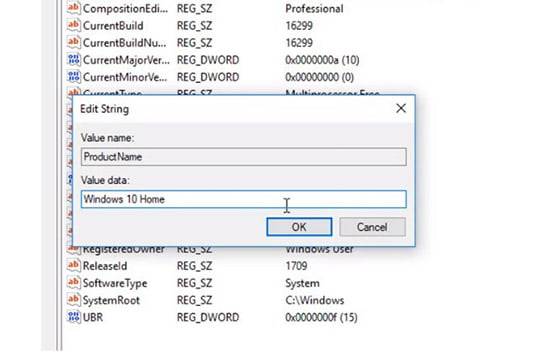
Now search out for the product name. As you are using an activated windows 10 pro version, you will find the product name saying windows 10 pro. Double click on it and alter the name to Windows 10 Home. Shoot OK.
Step 06:
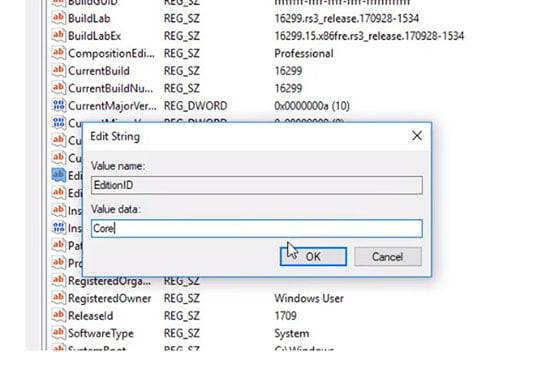
The next step is to edit the EditioID option from Professional to Core. Click twice on this option and have a look at the Value Data Option to alter it and write down Core in the empty box. Click OK
Step 07:
Do not think it is almost done. More changes are required in the Registry option. So, you need to go to the next option, till the time you close the current window.
Step 08:
Next, follow this path. Computer\HKEY_LOCAL_MACHINE\SOFTWARE\WOW6432Node\Microsoft\Windows NT\CurrentVersion

Step 09:
Follow step # 5
Downgrade windows 10 enterprise to pro- installed windows 10 pro instead of home
Step 10:
The product name needs alteration to Windows 10 Home as well as EditionID to Core.
Step 11:
Now close the registry editor.
Step 12:
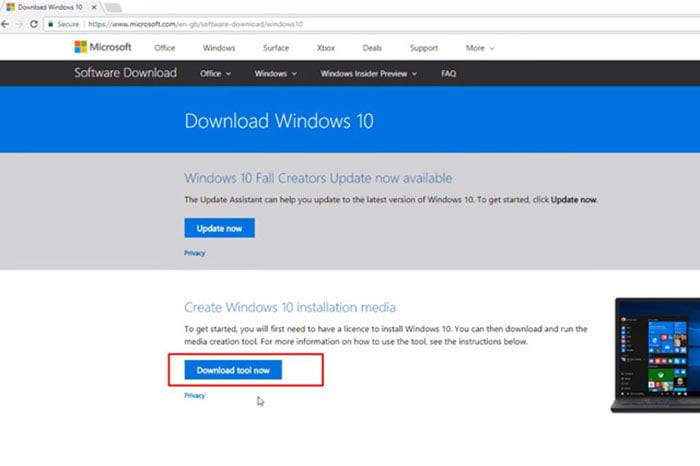
Is the media creation tool already downloaded on your desktop? If not, download it. To do so, open your browser, go to Google, write down the “Media Creation Tool” in the search box, and press Enter. Download it from the best authentic source like Microsoft.
Step 13:
After download, open it to start working and wait until it opens.
Step 14:
Do not forget to hit “Accept” for the Microsoft Software License form. Unless you can not proceed to the next level.
Step 15:
From the next screen, two options will be available. One is “Upgrade this PC” now, and another one is “Create installation media (USB flash drive, DVD, or ISO file) for another PC.” Select the second one and click Next.

Step 16:
In the next window, tick the option “Use the recommended options for this PC.” Hit next.
Step 17:
Tick the ISO file and go next.

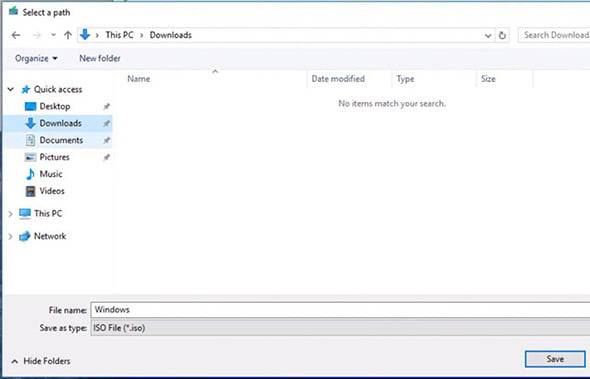
Step 18:

Then, you need to save the file in a specified location. While saving, remember the place unless, after saving, you may forget where you have saved. You have to wait until the file is saved to your desired location.
Step 19:
At this point, you need to decide on the following option
- You can burn this ISO file to a DVD.
- You can use it to install Windows again.
- You can mount this ISO image to a virtual drive.
- You have all the right to make the decision.

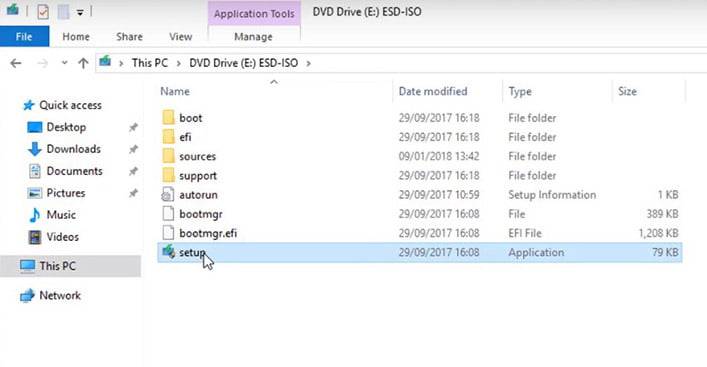
Step 20:

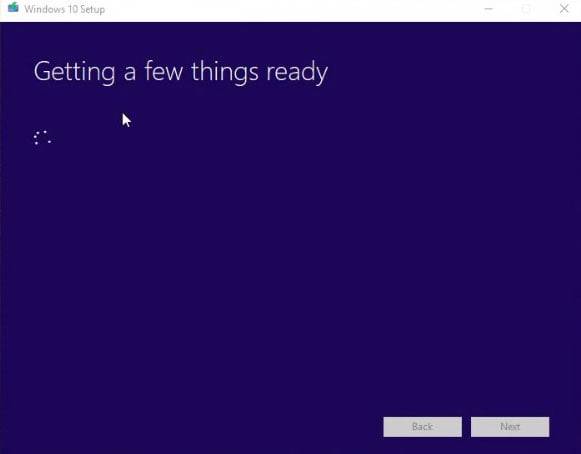
Then you need to open the setup file from the mounted image or from the DVD you inserted. Let’s wait for some time until the program is launched.

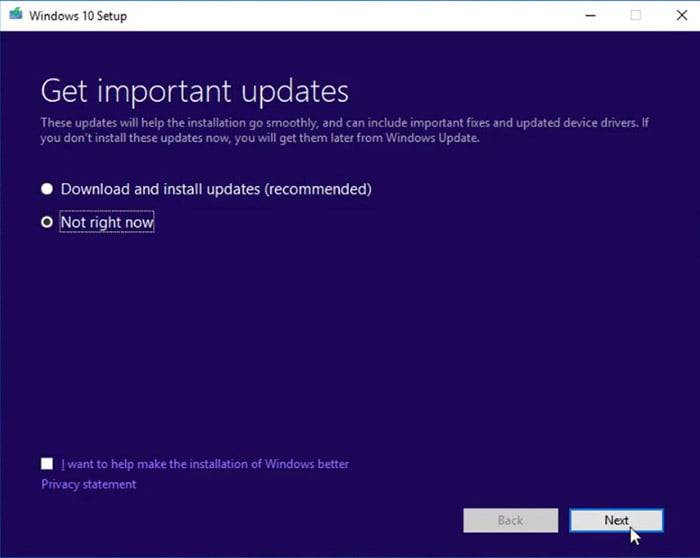
Step 21:
A new screen will appear and select the option “Not right now” and click next.
Step 22:
You should unclick the option “Not Right Now” when it is seeking permission to Get Important Updates.
Step 23:
Accept the license term.

Step 24:
Now in this step, you need to install Windows 10 Home, and you will be able to keep the files and apps unchanged.
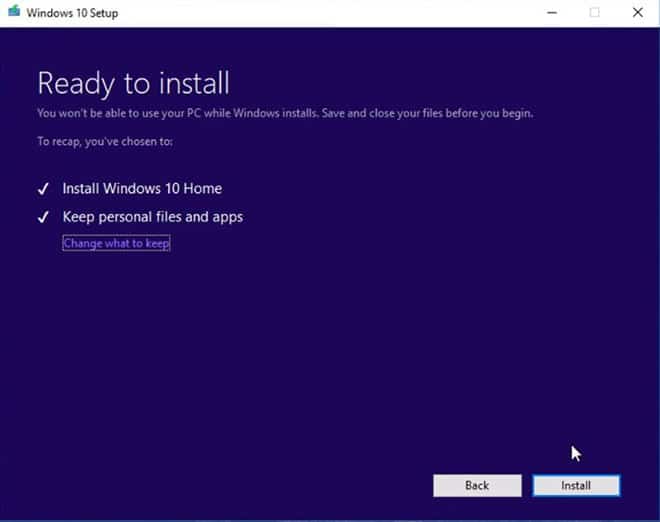
Step 25:
Click install, and you need to give time to get installed.
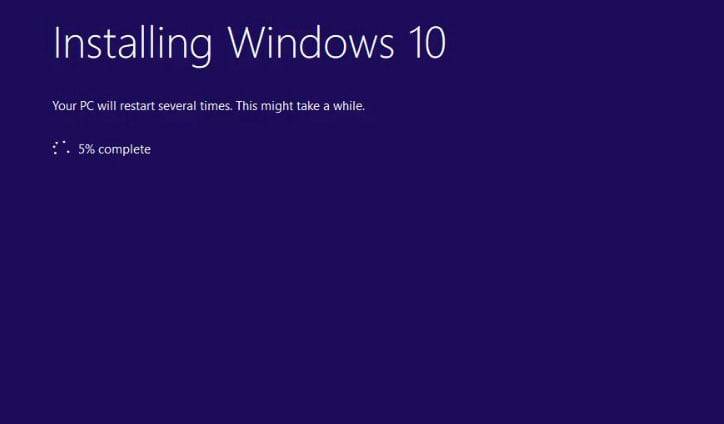
Step 26:
Finally, windows 10 home is installed on your computer. While installing, your PC will take several Restarts. Don does not worry about it; it is normal.

Step 26:
Before using the computer, check your files.
Finally, everything is done, and you already have an updated version of Windows 10 home. Sometimes a step backward does boost us to a huge jump forward. We hope that your increase ahead is as huge as you want it.