You may wish to setup Windows 11 to discover this newest OS on your own, since it has vastly enhanced the user experiences and incorporated a number of compelling new features. Those using Windows 10 should update to Windows 11 using Windows Update as soon as possible. Yet several consumers complained that their installations got stopped on different parts of the process.
Possible Reasons for Windows 11 Setup Getting Stuck at 73
It’s conceivable that updates are downloading in the process, but the percentage indicator stops because of sluggish Internet connectivity or a power outage. Installation of Windows 11 may be hampered by conflicting drivers, such as a constant sound driver. Incompatible hardware, software, or trash files might also contribute to the problem.
Ways to Fix Windows 11 Installation Stuck at 73
The approaches listed below can be used to resolve a delayed Windows 11 installation:
Let Windows 11 Finish Updating on Your System
As was previously indicated, problems with the Internet or electricity might cause the Windows 11 upgrade to get stuck. You may keep your system connected in and idle for as long as the setup takes.
Activate the Windows Update troubleshooter
If you suspect Windows Update is causing issues, the first step should be to use the troubleshooter included into Windows.
Choose Settings from the Start menu. You can locate Troubleshoot by going to the Settings page and then to Update & Security. Additional troubleshooters may be accessed from that page.

Locate Windows Update in the list of other troubleshooters, select it, and subsequently choose Run the troubleshooter.

Rest easy as the troubleshooter actively searches for and resolves any concerns it detects. After that, you may restart your computer and the update will begin downloading and running automatically.
Turn On Secure Boot for Your System
Turn on your computer and go to the startup menu. To change the bios settings, choose that option from the starting menu. Boot settings may be accessed in the Advanced menu.
Now you need to activate secure boot by finding it. Then, you may simply quit after saving the modifications. Turn the computer back up and go to the starting menu once again. To install Windows 11, choose the boot device options and then pick the appropriate drive. This will upgrade your PC to Windows 11.
Unplug Any Peripherals
It is possible that you could have the same problem if you have certain devices connected to your computer. If the setup of Windows 11 is stalled at any point and none of the preceding troubleshooting techniques were successful in resolving the problem, the next action that you should take is to unplug all of the exterior devices that are linked to your desktop pc. If you are attempting to setup the Windows 11 upgrade on a computer that is linked to loudspeakers, storage devices, or any other kind of peripheral device, consider downloading the update once more.
Remove Incompatible Applications from Your System
If the problem remains, you’ll need to investigate whatever software and data aren’t working well.
Press the “Start” option. Choose Apps & Features from the Settings menu after locating Apps.
Look below to see which programs on your computer are not compatible with Windows 11. It may be located by running PC Health Checkup. Delete them from the system by clicking the “Uninstall” option.
Rebooting Windows Update Service
If you’ve already tried the aforementioned solutions without success, restarting Windows Update could be the next best thing to attempt. It’s as easy as following these steps to get Windows Update going again:
To begin, open a command prompt with administrative privileges. Browse the Start screen for CMD. When you right-click the Command Prompt button, you’ll get an option to “Run as administrator.”
Enter and execute the following instructions at the CMD prompt to terminate the service-
Net stop wuauserv
Net Stop bits
Tapping the Windows key plus the letter E will launch File Explorer. To access this location, open File Explorer and type in-

Use the shortcut key combination of Ctrl + A to choose all the items in this folder, and then remove them.
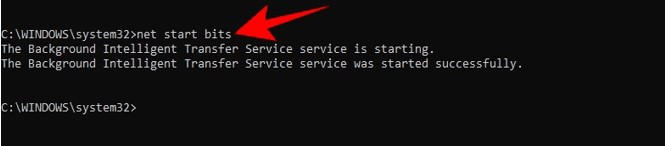
It’s time to restart the service. To achieve this, launch the Command Prompt and, one by one, input the commands listed below-
Net stop wuauserv
Net Stop bits
The Windows Update service will now resume. After that, you may try running the Windows 11 upgrade once again without experiencing any problems.
Conclusion
A significant number of people who attempted to upgrade to Windows 11 encountered an error during the installation process. During the Windows 11 setup process, they come across the “Windows 11 installation stalled” error. If you’re experiencing Windows 11 installation problems, and you’ve already tried everything else, maybe any of the options above can assist you to resolve Windows 11 Installation Stuck at 73 issues.